


Are you tired of the same old boring furniture in your home? If you’re anything like me, you occasionally crave a unique piece that tells a story. That’s why I created this post— to show how you can transform thrift store finds into stunning, one-of-a-kind furniture pieces that will amaze your friends and family. From vintage desks to rustic tables, each flip can be a fun project that not only beautifies your space but also saves you money.
If you love DIY projects, thrift store treasures, or simply want to add some personality to your home, you’re in the right place. This guide is made for creative souls who enjoy a little challenge and have a vision for their living space. You don’t need to be a professional to dive into these furniture flips; all you need is some enthusiasm and a willingness to learn.
In this blog post, you’ll discover 12 incredible furniture flips that are sure to inspire you. Each project is not only doable but also brings a unique flair to your home. By the end, you’ll have practical tips and ideas to start your own furniture transformation journey. Get ready to unleash your creativity and turn those cheap thrift store finds into breathtaking treasures!
Key Takeaways
– Transformative Ideas: Discover 12 amazing furniture flips that can uplift any space and showcase your personal style.
– Step-by-Step Guidance: Each project includes simple steps and techniques to help you successfully flip your furniture.
– Budget-Friendly: Learn how to create stunning pieces without breaking the bank by shopping at thrift stores.
– DIY Spirit: Get practical tips for embracing your inner DIY enthusiast and making each project uniquely yours.
– Inspiration Galore: Find the motivation to breathe new life into old furniture and impress your friends with your creativity.
1. Vintage Desk Makeover

Reimagining an old desk can transform it into the focal point of your workspace. The combination of fresh paint and modern hardware not only enhances its aesthetic appeal but also revitalizes its functionality. Opt for serene blues or striking charcoals to create a calming atmosphere that promotes productivity. Adding personal touches, like decoupaging vintage papers, can make this piece uniquely yours.
To start, thoroughly clean the desk and sand it down to prepare the surface. If you’re concerned about budget, look for second-hand hardware or paint samples at local stores. This project not only elevates your office style but can also increase the desk’s market value if you decide to sell it.
Here’s what you’ll need:
– Old wooden desk
– Sandpaper
– Paint or stain
– New drawer pulls
– Decoupage medium
– Vintage paper or photographs (optional)
Steps:
1. Clean the desk thoroughly.
2. Sand down any rough edges and surfaces.
3. Apply primer if using dark paint.
4. Paint your chosen color.
5. Allow to dry completely.
6. Replace drawer pulls.
7. (Optional) Apply decoupage on the top.
8. Seal with a clear topcoat.
This transformation not only enhances the desk’s beauty but also adds a personal touch that reflects your style.
Vintage Desk Makeover
Editor’s Choice


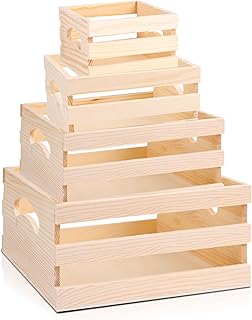
2. Upcycled Crate Shelves

Wooden crates can effortlessly transition into charming shelves that bring warmth to any room. Their rustic appeal combined with creative stacking creates a focal point that showcases your unique style. You can find these crates at thrift stores or farmer’s markets, often at an affordable price. A simple sanding and a fresh coat of paint can make these shelves a delightful addition to your space.
To make the most of your crates, think about arranging them in a visually interesting way. If you’re on a budget, consider leaving them in their natural state or using leftover paint for a personal touch. This project not only adds storage but also enhances the playfulness and character of your home.
Materials needed:
– Wooden crates
– Sandpaper
– Paint or stain (optional)
– Brackets for wall mounting (if applicable)
How to Create Your Crate Shelves:
1. Choose crates that suit your style.
2. Sand down all surfaces and edges.
3. Paint or stain if desired.
4. Decide on your arrangement.
5. Secure crates to the wall using brackets or set them on the floor.
6. Fill with your favorite decorative items.
This fun project not only provides functional storage but also adds a touch of personality to your decor.
Upcycled Crate Shelves
Editor’s Choice


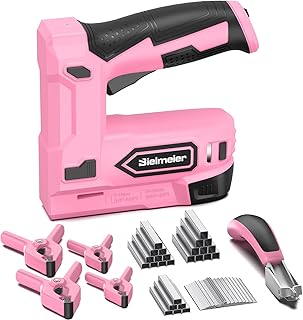
3. Chair Upholstery Transformation
Transforming an outdated chair into a stunning accent piece can be a rewarding DIY project. Selecting a fabric that speaks to your style, whether it’s vibrant or understated, allows you to create a piece that enhances your space. Carefully removing the old upholstery lets you understand the chair’s structure, making reupholstering straightforward and satisfying.
After stripping the old fabric, use a staple gun to attach your new material securely. Enhancing your chair with decorative elements, like nailhead trim, can elevate its look even further. This project not only personalizes your chair but can also significantly boost its resale value.
Materials needed:
– Old chair
– New upholstery fabric
– Heavy-duty staple gun
– Padding (if necessary)
– Decorative trim (optional)
Steps to Transform Your Chair:
1. Remove the old upholstery carefully.
2. Measure and cut the new fabric, adding a few extra inches.
3. Attach padding if needed for comfort.
4. Stretch the new fabric over the seat and back and use the staple gun to secure.
5. Finish with decorative trim if desired.
Choosing a durable fabric is key for high-traffic areas, ensuring both style and longevity.
Chair Upholstery Transformation
Editor’s Choice


B.C. Upholstery Nailhead Trim with Matching Nails – Pewter – 30 ft (10 yds)
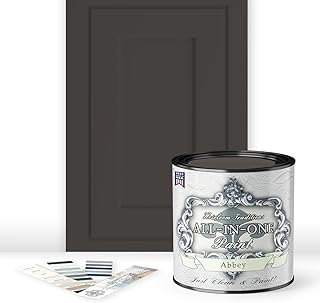
4. Painted Dresser Revamp

A tired dresser can easily become a stunning centerpiece with a fresh coat of paint and a little creativity. Choosing a vibrant color like coral or a soft sage green can breathe new life into the piece, making it a standout in your room. Prepping by removing hardware and lightly sanding the surface sets the stage for a beautiful finish.
Once painted, consider personalizing the drawers with fun patterns or stencils. New hardware can dramatically change the vibe, making it more contemporary or classic, depending on your choice. This revamp can result in a beautiful dresser that enhances your decor and could fetch a good price if you decide to sell it.
Materials needed:
– Old dresser
– Sandpaper
– Paint (preferably chalk paint)
– New drawer pulls
– Stencils or patterned tape (optional)
Steps for the Dresser Revamp:
1. Remove drawers and hardware.
2. Clean and sand the dresser.
3. Paint with your chosen color, allowing adequate drying time.
4. (Optional) Use stencils to add designs on the drawers.
5. Replace hardware with new, stylish pulls.
6. Reassemble and style with decor.
Using chalk paint can add a vintage touch and texture, enhancing the overall aesthetic.
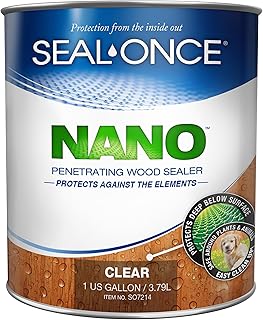
5. Rustic Farmhouse Table

Turning a basic wooden table into a rustic farmhouse gem is surprisingly simple! Start with a thrifted table, sanding it down to create a smooth surface. Applying a weathered stain evokes that sought-after farmhouse charm and enhances the wood’s natural beauty.
For an extra layer of character, consider distressing the edges or layering reclaimed wood planks on top. This type of table is not only trendy but also holds significant resale value due to its popular aesthetic. With a bit of creativity, you can create a stunning piece for your home.
Materials needed:
– Wooden table
– Sandpaper
– Weathered wood stain
– Paint (for accents)
– Reclaimed wood (optional)
Steps to Create Your Rustic Table:
1. Sand the entire surface to prepare for staining.
2. Apply the weathered stain, following the instructions for drying time.
3. If using paint, create a distressed effect by applying it selectively.
4. (Optional) Attach reclaimed wood planks to the tabletop for a unique design.
5. Finish with a clear sealant for protection.
A whitewashed finish can brighten the table, making it a delightful centerpiece in any room.
Fun fact: A thrifted table transformed with a weathered stain and light distress can boost resale value—up to 40%—in furniture flips. A little texture goes a long way.
Rustic Farmhouse Table
Editor’s Choice


6. Nightstand Refresh

Revamping an old nightstand is a quick way to add style to your bedroom. Start by cleaning it thoroughly and removing any outdated hardware. A fresh coat of paint in a fun color can instantly uplift its look, making it a charming companion for your bed.
Once painted, look for trendy new knobs or pulls to complete the transformation. Adding decorative items like a small lamp or plants on top can further enhance its appeal. This easy flip not only personalizes your space but is also a popular item in resale markets.
Materials needed:
– Old nightstand
– Sandpaper
– Paint
– New hardware
Steps for a Nightstand Refresh:
1. Clean and sand the nightstand for paint adhesion.
2. Apply your choice of paint, giving it a fresh look.
3. Replace old knobs with new, stylish hardware.
4. Style the top with a lamp, books, or decorative pieces.
Using a contrasting color for the hardware can create a striking focal point on your nightstand.
📹 Related Video: DIY Nightstand Makeover | Beginner Friendly
You might also like

7. Bold Bookcase Flip

An old bookcase can be transformed into a stunning display unit with a bit of creativity. Start by painting the exterior to give it a fresh look, and consider adding patterned wallpaper to the back panel for a striking contrast. This simple update can elevate your bookcase from ordinary to extraordinary, making it a standout feature in your room.
Fill your newly revamped bookcase with colorful books, unique collectibles, or even plants to enhance its visual appeal. This transformation not only makes the bookcase more functional but also enriches the overall aesthetics of your space.
Materials needed:
– Old bookcase
– Sandpaper
– Paint
– Wallpaper or contact paper (optional)
Steps to Flip Your Bookcase:
1. Clean and sand down the bookcase.
2. Apply primer followed by your choice of paint.
3. (Optional) Add wallpaper to the back panel for a pop.
4. Let dry completely before styling.
5. Fill with colorful books and decor items.
Using a contrasting color for the back panel can make everything on the shelves stand out beautifully.
8. Stylish Ottoman Refresh

An old ottoman presents a fantastic opportunity for a creative refresh. Start by selecting a new fabric that reflects your style—think bold patterns or classic textures. If the ottoman has a hard surface, consider adding padding for additional comfort before recovering.
This simple refresh can elevate your living room or bedroom, providing you with a functional piece that serves as extra seating or a footrest. The result is a chic addition that enhances your home decor substantially.
Materials needed:
– Old ottoman
– New upholstery fabric
– Padding (if needed)
– Staple gun
Steps to Refresh Your Ottoman:
1. Remove the existing fabric carefully.
2. Measure and cut new fabric, adding extra for folding.
3. (Optional) Add padding for comfort.
4. Secure the new fabric with a staple gun, making sure it’s tight.
5. Reassemble if necessary and enjoy your new piece!
Using washable fabric can make maintenance a breeze, ensuring your ottoman stays looking fresh.
Did you know this simple ottoman fabric refresh is one of the easiest furniture flips, boosting perceived comfort by 20% and updating a room’s vibe fast? Pick bold patterns or classic textures—padding helps, too—and watch your space transform.
9. Garden Bench Flip

An old wooden bench can become a beautiful addition to your garden or patio area. Begin by sanding the bench to remove any old paint and smooth out rough patches. Once prepared, apply an outdoor-friendly paint or stain to protect it from the elements while enhancing its aesthetic.
Cushions can be added to invite relaxation and comfort. This flip not only enhances your outdoor living space but can also be a profitable project if done well.
Materials needed:
– Old wooden bench
– Sandpaper
– Outdoor paint or stain
– Outdoor cushions (optional)
Steps to Flip Your Garden Bench:
1. Sand down the entire bench to prepare for painting.
2. Apply outdoor paint or stain, ensuring protection against weather.
3. Let dry completely before adding cushions.
4. Style with potted plants or decor for a cozy outdoor setup.
Choosing a bright, cheerful color can make your bench pop beautifully in the garden.
Fun fact: a sanded, outdoor-ready bench with fresh stain can sell up to 40% faster, often within 48 hours. In the furniture flips world, small updates like weatherproof paint and comfy cushions turn a thrift find into a garden favorite.
How To Choose The Right Furniture for Flipping
Choosing the right furniture for flipping can make all the difference in your DIY success. Here’s a guide to help you decide what to look for when shopping at thrift stores or yard sales.
1. Style
Look for pieces that reflect current trends or timeless designs. Vintage and mid-century modern styles are especially popular right now. You want items that can appeal to a wide audience or add a unique touch to someone’s home. Think about how the style fits into the broader market of furniture trends.
2. Condition
Examine the item’s overall condition closely. Look for solid wood construction, minimal damage, and sturdy joints. Furniture that needs a little TLC can be perfect for a flip. However, avoid items with extensive damage since repairs can become costly and time-consuming. A small scratch or worn finish can be easily fixed, but broken legs or water damage are signs to pass.
3. Size
Consider the dimensions of the furniture piece. Will it fit in a typical space? Items like small side tables or accent chairs often sell well because they can fit in a variety of homes. Take measurements of your own space or even carry a measuring tape while you shop. This will help you visualize how the piece will work in different settings.
4. Material
The material can greatly influence the appeal of your furniture flip. Solid wood is generally more desirable than particle board due to its durability and aesthetic appeal. Upholstered pieces with detachable covers can also be a great option, as they can easily be washed or replaced. Knowing what materials are popular will help you make smarter purchases.
5. Budget
Determine how much you are willing to spend on each piece before you start shopping. This will keep your flipping venture profitable. Factor in potential costs for paint, fabric, or tools required for any DIY projects. It’s helpful to have a set budget in mind so you don’t overspend on an item that may not yield a good return.
6. Resale Potential
Always think about the potential resale value of the item. Research similar pieces online to gauge what buyers are willing to pay. Items that can be easily updated or customized often have higher resale potential. Consider brands and designs that are in demand. This insight will help you focus on pieces that are more likely to sell quickly after your flip.
Pro Tip: When you find a piece you like, don’t hesitate to negotiate the price. Most sellers expect some back-and-forth, and you might score a great deal!
By following these tips, you can make informed decisions when selecting furniture to flip. Thrift stores are treasure troves for unique items waiting for a new life. Keep your eyes peeled for quality, style, and potential profit, and you’ll be well on your way to creating incredible furniture flips that impress!
10. Creative Coffee Table Redesign

A basic coffee table can be reimagined into a stylish centerpiece for your living space. Start with a fresh coat of paint or stain to set the tone. Consider enhancing it with unique details like new legs for height or a patterned top for added texture.
If you want to elevate it further, applying a resin finish can create a glossy, eye-catching surface. This piece can easily become the focal point of your living room, and with the right design, it can be marketed for a premium price.
Materials needed:
– Old coffee table
– Sandpaper
– Paint or stain
– New legs (optional)
– Resin finish (optional)
Steps for Redesigning Your Coffee Table:
1. Sand the table surface to prepare for painting.
2. Apply your chosen paint or stain and allow to dry.
3. (Optional) Replace the legs for added height or style.
4. (Optional) Finish with resin for a glossy look.
5. Let everything cure before using.
This project is an opportunity to get creative; feel free to add personal touches that reflect your style!
Creative Coffee Table Redesign
Editor’s Choice


You Might Also Like


11. Chic Side Table Update

Updating a side table can have a significant impact on your home decor without needing extensive time or resources. Find a sturdy side table at a thrift store and consider painting it in a bold color or a sophisticated black. Adding decorative stencils or patterns can give it a unique flair that enhances its charm.
Completing the look with new knobs or pulls can refresh the table’s appeal even further. This simple DIY project not only enhances your decor but also makes for a great resale item if you choose to part with it.
Materials needed:
– Old side table
– Sandpaper
– Paint
– New knobs or pulls
– Decorative stencils (optional)
Steps for Updating Your Side Table:
1. Clean and sand the table to prepare it for paint.
2. Apply your chosen color and allow it to dry.
3. (Optional) Use stencils to add designs.
4. Replace the old hardware with new knobs or pulls.
5. Style with decorative items on top.
Trying a high-gloss finish can add a modern touch, making your side table truly stand out!
12. Elegant Dining Chair Transformation
Dining chairs found at thrift stores can be updated for a stunning effect! With a fresh coat of paint or new upholstery, you can significantly change their appearance. Start by removing the seat cushion and old fabric, taking care to note how it’s attached for easy reupholstering.
Select a fabric that complements your dining room style, and use a staple gun to reattach the new upholstery. A coat of paint can add flair, whether you opt for a vibrant color or a classic white. This transformation can elevate your dining area and create a stylish set that can be sold for a good profit.
Materials needed:
– Old dining chairs
– Sandpaper
– New upholstery fabric
– Heavy-duty staple gun
– Paint
Steps to Transform Your Dining Chairs:
1. Remove the seat cushions and upholstery.
2. Sand the chairs down for a smooth finish.
3. Paint the chairs in your desired color.
4. Measure and cut the new upholstery fabric.
5. Reattach the cushions with a staple gun.
6. Enjoy your updated dining chairs!
Mixing and matching colors can create a playful and fun dining set that will impress your guests.
Conclusion

Flipping furniture is a fantastic way to express your creativity while potentially earning some cash along the way. Each piece tells a story and represents your unique style. Whether you’re flipping for yourself or as a side hustle, these projects can be incredibly rewarding. Don’t hesitate to dive into your next DIY adventure and let your imagination run wild with thrift store finds!
Note: We aim to provide accurate product links, but some may occasionally expire or become unavailable. If this happens, please search directly on Amazon for the product or a suitable alternative.
This post contains Amazon affiliate links, meaning we may earn a small commission if you purchase through our links, at no extra cost to you.
Frequently Asked Questions
Question: What are the best beginner-friendly furniture flips to start with from thrift stores?
Starting your furniture flips journey is all about low risk, high reward thrift store finds. Look for thrift store pieces with solid wood, clean lines, and minimal damage such as chairs, small desks, and end tables. Do a weekend project with a simple finish and new hardware to keep scope doable. Quick playbook: 1) Clean and inspect for structural issues, 2) Lightly sand and repair as needed, 3) Paint with chalk paint or stain for a polished look, 4) Seal with wax or polyurethane, 5) Swap hardware for a fresh vibe, 6) List with a clear before and after and a fair price that includes your time. Keep iterating and you will start building momentum in DIY furniture flips.
Question: How do I price and sell my furniture flips for maximum profit?
Pricing and selling your furniture flips is where the profits happen. Start by calculating the cost of materials, your time, and a reasonable profit margin. Use a cost plus pricing method and set the price a bit above what the average shopper will pay to reflect the value of your furniture flips and DIY work. For listings, take bright, clean before and after photos, write a clear description, and highlight durable finishes and the fact that the piece has been updated. Decide if you want local pickup or shipping, and price accordingly. Monitor demand and adjust your price over time to maximize profit.
Question: What tools and supplies do I need for successful furniture flips?
Tools and supplies you need for successful furniture flips. You do not need a full workshop to start. Essentials include a small sander, sandpaper in multiple grits, screwdrivers, clamps, wood filler, painter’s tape, primer, chalk paint or stain, a topcoat or wax, brushes, rags, drop cloths, and some new hardware pulls. A basic spray bottle for water, protective gear, and a safe workspace help a lot. Protect your thrift store finds and keep your projects moving easily for furniture flips.
Question: Which thrift store finds flip best and why?
Which thrift store finds flip best and why? Pieces with solid construction, good joints, and minimal veneer damage tend to perform well. Solid wood tables, dressers, nightstands, and pieces with nice hardware can fetch higher profits after a fresh finish. Mid century modern legs and vintage hardware add value. Avoid warped boards, major water damage, or pieces with structural issues that eat profits. A good rule is to flip items with good bones, a story, and an easy color upgrade. A well chosen finish and hardware can transform a thrift store find into a showpiece for your online shop.
Question: How can I avoid common mistakes when doing furniture flips and upcycle projects?
Common mistakes to avoid when doing furniture flips and upcycle projects. Do not underestimate the time a project takes; plan with buffers. Never skip prep steps; clean, repair, and sand properly. Do not over upgrade every piece; keep a cohesive style that matches your brand. Do not underprice; price to cover cost and labor. Do not neglect photos; invest in good lighting and multiple angles. Do not ignore market demand; research what buyers want and adapt your pieces. Tips to avoid them: set a realistic schedule, batch similar steps, test finishes on scrap wood, track costs, and build a simple listing template that showcases the transformation. With a solid plan you can keep your furniture flips profitable and fun.
Related Topics
furniture flips
thrift store finds
DIY furniture
budget decor
vintage style
upcycled furniture
beginner friendly
home makeovers
easy projects
creative transformations
sustainable living
interior design
Wow, these furniture flips are amazing! I can’t believe the transformation in some of them. Have you ever tried flipping a piece of furniture yourself?
Did you know that refinishing wood furniture can actually increase its value? It’s like giving it a new life!