


Vintage furniture restoration is more than just a hobby; it’s a rewarding journey into the past. With each piece telling its own story, restoring vintage furniture allows you to breathe new life into forgotten treasures. This post was created to guide you through that journey, ensuring you have all the essential tools you need at your fingertips. Whether you’re looking to turn an old chair into a stunning statement piece or bring a timeless chest of drawers back to its former glory, having the right tools can make all the difference.
If you’re a DIY enthusiast, a vintage lover, or someone simply seeking a creative outlet, this guide is designed for you. You care about quality, craftsmanship, and the satisfaction of achieving something beautiful with your own hands. In this post, you’ll discover 19 must-have tools for successful vintage furniture restoration. These tools will not only simplify your projects but will also ensure that your work is effective and enjoyable.
From an orbital sander that smooths surfaces to high-quality brushes for applying paint, the right tools can elevate your restoration game. Each tool plays a crucial role in different stages of the restoration process, helping you achieve professional results while saving money. Dive into this treasure trove of information and get ready to transform your vintage finds into stunning pieces that will be cherished for years to come.
Key Takeaways
– Understanding the essential tools for vintage furniture restoration can streamline your DIY projects and enhance your results.
– Tools like an orbital sander and paint stripper are crucial for preparing surfaces and removing old finishes effectively.
– High-quality paint brushes and finishing products are key to achieving a polished look on your restored furniture.
– Safety gear, including dust masks and gloves, is essential to protect yourself during restoration tasks.
– Investing in versatile tools like clamps and wood glue can make repairs and assembly smoother and more reliable.
1. Orbital Sander

An orbital sander is an essential tool for anyone diving into vintage furniture restoration. This powerful tool effectively smooths out rough surfaces, preparing them perfectly for painting or staining. Its circular sanding pad moves in a way that ensures a consistent finish, making it easier to remove layers of old paint or varnish without harming the wood beneath. Imagine revitalizing a weathered piece and watching it transform with just a few passes of this handy device.
To get the best results from your orbital sander, start with coarse grit sandpaper to eliminate old finishes, then switch to finer grit for a polished appearance. Always remember to wear a mask and goggles to protect yourself from dust.
Here’s how to maximize your sander’s potential:
– Choose the right grit sandpaper for your task.
– Secure the sandpaper properly on the sander.
– Gently run the sander over the surface to avoid damage.
– Change sandpaper as necessary for optimal results.
Using an orbital sander will dramatically reduce your workload, making it an indispensable companion for all your restoration endeavors.
Fun fact: An orbital sander can cut prep time in half when you’re restoring vintage furniture. A few even passes leave a perfectly smooth surface, ready for stain or paint. Pro tip: start with coarse grit, finish with fine grit for a flawless finish.
Orbital Sander
Editor’s Choice


2. Paint Stripper

When dealing with layers of stubborn old paint, a reliable paint stripper is your best friend in vintage furniture restoration. These products effectively break down tough finishes, allowing for easy removal without excessive sanding. You can find paint strippers in various forms like liquids, gels, and pastes, each offering unique benefits tailored to your project needs.
For effective use of paint stripper, apply a generous layer to the surface and let it sit as directed. Always test on a small area first to ensure compatibility.
Here’s how to use paint stripper effectively:
– Apply with a brush for even coverage.
– Allow it to sit for the recommended time.
– Carefully scrape off the old paint with a scraper.
– Clean the surface thoroughly before sanding or refinishing.
Using a good paint stripper not only saves you time but also helps preserve the character of your vintage pieces, making it a crucial tool in your restoration toolkit.
3. High-Quality Paint Brushes

When it comes to applying paint or finishes, high-quality paint brushes truly make a difference. Investing in a set of good brushes ensures even application and a professional finish, giving your vintage furniture the attention it deserves. Depending on your project, choose brushes with synthetic or natural bristles; soft bristles work best for water-based paints, while synthetic brushes are ideal for oil-based finishes.
Maintaining your brushes is key to their longevity. Clean them immediately after use to keep them in great shape.
Here’s how to care for your brushes:
– Rinse with warm water and soap for water-based paints.
– Use solvent for oil-based paints.
– Reshape the bristles and store them upright.
With a variety of brushes in hand, you’ll be well-equipped to tackle any project, ensuring your vintage furniture shines with a flawless finish.
📹 Related Video: PAINTER’S TRICK restores OLD, HARD, DRY paint brushes
4. Clamps

Clamps are vital tools in the world of furniture restoration, providing the support needed to hold pieces securely in place during repairs. They help ensure everything aligns perfectly while glue dries, preventing any shifts that could ruin your hard work. With various types of clamps available, including bar clamps and C-clamps, each serves a unique purpose in your projects.
Applying even pressure is crucial when using clamps to avoid damaging your furniture.
Here are some tips for effective clamping:
– Always use protective pads to prevent marring.
– Tighten just enough to hold; avoid over-tightening.
– Check alignment before the glue sets.
By having a selection of quality clamps, you can confidently restore vintage furniture, ensuring it remains structurally sound throughout the process.
Clamps
Editor’s Choice

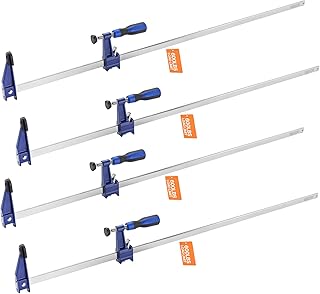


IRWIN QUICK-GRIP Bar Clamp, One-Handed, Heavy-Duty, 50-Inch (1964716), Blue

5. Screwdriver Set

A comprehensive screwdriver set is a must for vintage furniture restoration. As you work on your projects, you’ll likely encounter screws that need tightening, replacing, or removal. Having the right screwdriver on hand saves time and minimizes frustration. A set that includes both flathead and Phillips head options will cover most of your needs.
When choosing a screwdriver set, look for ergonomic handles for comfort and magnetic tips for easy screw handling.
To use screwdrivers effectively:
– Match the screwdriver type to the screw head for a snug fit.
– Apply gentle pressure while turning screws.
– Use penetrating oil for stubborn screws.
A reliable screwdriver set is a small but powerful addition to your restoration toolkit, essential for anyone serious about vintage furniture projects.
6. Measuring Tape

Precise measurements are critical in any restoration project, making a reliable measuring tape indispensable. When restoring vintage furniture, you may need to cut new pieces or fit hardware, and a measuring tape helps ensure that everything aligns perfectly. Accurate measurements prevent costly mistakes and ensure your pieces fit seamlessly in your space.
Look for a tape that locks in place for convenience and displays both imperial and metric measurements.
Here are some best practices for measuring:
– Always begin at one end and extend the tape evenly.
– Double-check measurements before cutting.
– Use a pen or pencil to mark cut locations.
With a measuring tape at your side, you’ll gain confidence in your projects, enhancing the accuracy of your restorations.
Fun fact: A locked-in measuring tape saves up to 20% material waste when restoring vintage furniture. Precision matters: using imperial and metric scales helps you fit hardware and trim pieces perfectly the first time.
How To Choose The Right Tools for Vintage Furniture Restoration
Choosing the right tools for vintage furniture restoration is essential for achieving great results. With so many options available, you might feel overwhelmed. Here’s a handy guide to help you select the best tools for your next DIY project.
1. Purpose of the Tool
Before purchasing any tool, ask yourself what you’ll primarily use it for. Different restoration projects require different tools. For instance, if you plan to sand down wood surfaces, you’ll need tools like an orbital sander and wood fillers. Knowing your project’s needs will guide your selections.
2. Quality of Materials
Investing in high-quality tools is worth it for vintage furniture restoration. Look for tools made from durable materials, as they tend to last longer and perform better. For example, a good quality paintbrush can significantly affect the finish of your project. Always check reviews and recommendations before buying.
3. Size and Weight
Consider the size and weight of the tools. If you have limited space, compact tools can make your work easier. For instance, a lightweight detail sander is great for intricate areas in vintage pieces. Also, if you’re working for long periods, a lighter tool can reduce fatigue.
4. Safety Features
Safety is crucial when working with tools. Ensure that any power tools you choose have safety features, like blade guards or automatic shut-offs. Personal safety gear, such as dust masks and goggles, should also be top priorities. This way, you can focus on your project without worrying about accidents.
5. Budget Considerations
Set a budget before shopping for tools. Restoration can get expensive, but there are options for every price range. Consider buying a few essential tools first and gradually adding more specialized items as you progress. This approach helps spread out costs and gives you time to understand what you really need.
6. Availability and Support
Choose tools that are readily available in your area or online. Brands with good customer support are beneficial, especially for repairs or replacements. Check if spare parts are easy to find, as this can save you time and money in the long run.
Pro Tip: Always keep a wishlist of tools you want for future projects. This way, you can track discounts and sales, helping you build your collection without breaking the bank!
With the right tools in hand, you’re ready to dive into vintage furniture restoration. Remember, the effort you put into selecting quality tools will pay off with beautiful results in your projects!
7. Wood Glue

Strong wood glue is essential for vintage furniture restoration, allowing you to bond pieces securely. This tool is vital for fixing loose joints or broken parts that need reattachment. A quality wood glue offers a strong bond that withstands stress and time, ensuring your vintage treasures remain intact.
Look for quick-drying formulas for faster projects and waterproof options for added durability.
Here’s how to use wood glue effectively:
– Apply a thin layer to both surfaces being bonded.
– Clamp the pieces together while the glue dries.
– Clean off any excess glue immediately.
Many restorers swear by wood glue, as it not only strengthens joints but also maintains the integrity of your vintage pieces, making it a must-have in your restoration toolkit.
Wood Glue
Editor’s Choice


8. Tack Cloth

After sanding, ensuring your surfaces are free from dust is crucial, and this is where tack cloths become invaluable. Designed to pick up fine particles and dust, tack cloths leave a clean surface ready for painting or finishing. Without this simple tool, dust can interfere with adhesion, leading to a rough and uneven finish.
The advantages of using tack cloths are numerous, as they effectively remove debris and are easy to use.
Here’s how to use a tack cloth effectively:
– Unfold the cloth and lightly wipe the surface in one direction.
– Avoid applying too much pressure to prevent pushing dust back into the wood.
– Dispose of the cloth when it becomes dirty.
Keeping tack cloths handy ensures your restoration projects are smooth and polished, which is vital when working with vintage items.
You might also like


9. Wood Fillers

In vintage furniture restoration, imperfections can add character, but some require attention. Wood fillers are excellent for addressing gaps, cracks, or holes in your pieces. When applied correctly, they blend seamlessly with the existing wood, enhancing the overall aesthetic. Available in various colors, you can select one that matches your furniture perfectly.
Consider the types of wood fillers available, such as water-based for easy cleanup and solvent-based for tougher repairs.
To use wood filler effectively:
– Clean the area to be filled and let it dry.
– Apply filler with a putty knife, pushing it into the gap.
– Once dry, sand it down to match the surface.
Wood fillers are essential for achieving a smooth surface, ensuring your vintage furniture looks its absolute best.
10. Detail Sander

For those intricate designs and hard-to-reach areas, a detail sander is invaluable in vintage furniture restoration. Unlike larger sanders, detail sanders are smaller and designed to work in tight corners and curves. This makes them perfect for restoring ornate furniture with intricate carvings or unique shapes, ensuring every nook and cranny is smooth and ready for finishing.
The benefits of using a detail sander are significant, as it offers precise sanding for detailed work and its compact size enhances maneuverability.
To use a detail sander effectively:
– Choose the appropriate sandpaper for your project.
– Lightly move the sander over the surface, letting the tool do the work.
– Change sandpaper frequently for optimal performance.
Investing in a detail sander elevates the quality of your restorations, allowing you to achieve a professional finish even on the most intricate vintage pieces.
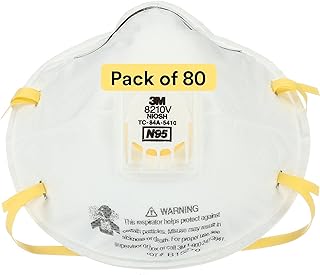
11. Safety Gear

Restoring vintage furniture can be a messy endeavor, making safety gear essential for any DIYer. When sanding, painting, or using chemical strippers, it’s crucial to protect yourself from dust, fumes, and splinters. Basic safety gear includes gloves, goggles, and a mask. Investing in quality safety equipment ensures a safer and more enjoyable restoration experience.
Include these items in your safety gear:
– A dust mask to avoid inhaling harmful particles.
– Protective goggles to shield your eyes from debris.
– Heavy-duty gloves to protect against chemicals and sharp tools.
To maximize the effectiveness of your safety gear:
– Always wear your mask when sanding or using chemical products.
– Replace filters in your mask as needed.
– Ensure goggles fit snugly to prevent slipping.
With safety gear in your toolkit, you can approach vintage furniture restoration projects with confidence, knowing you’re well-protected.
Safety Gear
Editor’s Choice


12. Chisels

Chisels are invaluable for any woodworker, particularly during vintage furniture restoration. They allow for precise carving, shaping, and removing old joints or parts that need replacing. A good set of chisels enables you to repair intricate details on vintage pieces without damaging the surrounding wood.
Look for quality chisels with high-carbon steel blades for durability and comfortable handles for better control.
To use chisels effectively:
– Ensure your chisel is sharp; dull chisels can lead to accidents.
– Secure your workpiece to avoid movement while chiseling.
– Use steady pressure and work slowly for accurate cuts.
Having a range of chisel sizes will empower you to tackle various aspects of your restoration projects, making them an essential part of your toolbox.
Chisels
Editor’s Choice


![KAKURI Japanese Wood Chisel Set [Long Handle] 3 Piece for Woodworking, M...](https://m.media-amazon.com/images/I/71XXQufMzkL._AC_UL320_.jpg)


13. Finishing Products

To enhance the beauty of your restored furniture, finishing products play a vital role. Whether you prefer oils, waxes, or varnishes, the right finish protects your piece while showcasing its natural beauty. Each product has its own application method and drying time, so it’s essential to choose one that fits your project’s demands.
Popular finishing products include natural oils for a deep luster, waxes for a soft protective layer, and varnishes for a hard, durable finish.
When applying finishing products:
– Ensure the surface is clean and dust-free.
– Apply with a clean, lint-free cloth or brush.
– Follow the manufacturer’s drying instructions.
Choosing the right finishing products not only protects your vintage finds but also enhances their character, making them a focal point in your home decor.
Finishing is where vintage furniture restoration truly shines. Oils, waxes, or varnishes—choose what fits your project, then wipe on a thin layer for depth, and watch natural beauty pop while lasting protection kicks in.
14. Pliers

Pliers are essential for vintage furniture restoration, especially when working with hardware. Dealing with old screws, nails, or fittings becomes much easier with a good pair of pliers. They’re also handy for bending or shaping materials that need adjustments, making a set of needle-nose and standard pliers a must-have.
The benefits of using pliers are clear: they provide a firm grip for difficult-to-move items and are versatile for various tasks around the workshop.
To use pliers effectively:
– Ensure you have the right type for the task.
– Apply steady pressure without forcing the tool to avoid damage.
– For better leverage, adjust your grip to suit your hand size.
With pliers in your toolkit, managing hardware and making adjustments becomes much simpler, allowing you to focus on the creative aspects of your restoration projects.
You Might Also Like

15. Dust Mask

A dust mask is crucial for anyone involved in vintage furniture restoration. As sanding and stripping paint release fine particles into the air, wearing a dust mask protects you from inhaling harmful dust and chemical fumes. It’s a small investment that significantly enhances your health and comfort while working.
Look for dust masks that offer a comfortable fit for extended wear and filters that are easy to replace.
To ensure your dust mask is effective:
– Make sure it fits snugly against your face.
– Replace filters according to the manufacturer’s recommendations.
– Avoid touching the exterior of the mask while working to keep it clean.
Incorporating a dust mask into your essential toolkit creates a safer working environment, allowing you to focus on restoring your vintage treasures worry-free.
16. Ruler and Square

Precision is key in vintage furniture restoration, making a ruler and square indispensable for accurate measurements and cuts. A ruler enables precise measuring, while a square checks angles to ensure everything aligns correctly. These tools can prevent costly mistakes, making them essential in your toolkit.
The benefits of using a ruler and square are substantial, as they ensure accuracy in all measurements and help maintain straight lines and right angles.
When using these tools:
– Always measure twice before cutting to avoid errors.
– Use a clean, flat surface to guarantee accuracy.
– Keep your ruler and square in good condition for reliability.
Incorporating these simple yet effective tools into your restoration process elevates the quality of your work, giving you peace of mind as you tackle each project.
17. Level

Having a level in your toolkit is essential for ensuring that your furniture pieces are straight and stable. During restoration, ensuring everything aligns properly is vital, especially when attaching multiple components. A level helps avoid issues with wobbling or uneven surfaces, making it a smart addition to your restoration supplies.
The importance of a level is clear, as it aids in achieving perfect alignment for restored pieces and prevents future stability problems.
To use a level effectively:
– Place it on the surface or joint you want to check.
– Adjust until the bubble centers between the lines.
– Mark any adjustments needed for your furniture.
With a level in hand, you can restore furniture confidently, ensuring each piece stands strong and upright in its new life.
18. Heat Gun

A heat gun is a versatile tool that can simplify various restoration tasks. It’s especially effective for stripping paint and softening adhesives, making the removal of old finishes easier without damaging the wood underneath. Heat guns come in various styles and temperature settings, allowing for precise control over your projects.
The benefits of using a heat gun are numerous, as it quickly removes old paint and finishes and softens adhesives for easier removal.
When using a heat gun, always remember to:
– Keep it moving to prevent damage to the wood.
– Wear protective gear to avoid burns.
– Use it in a well-ventilated space to evade inhaling fumes.
Incorporating a heat gun into your toolkit will streamline many aspects of vintage furniture restoration, allowing you to focus on perfecting your designs and finishes.
19. Sponges and Rags

Having sponges and rags handy is crucial for any restoration project. These tools are essential for cleaning up spills, applying finishes, and wiping down surfaces before painting. The right type of sponge or rag can enhance your efficiency and effectiveness. Look for absorbent cloths that won’t leave lint behind, as this can ruin your finish.
Here’s how to use sponges and rags effectively:
– Use damp sponges for applying stains or cleaners.
– Keep dry rags for wiping and polishing.
For best practices:
– Always have a few different types of rags ready—some for cleaning and others for finishing.
– Change them regularly to avoid spreading dirt.
By stocking up on sponges and rags, your vintage furniture restoration projects will run much smoother, helping you achieve professional-quality results.
Conclusion

Restoring vintage furniture is a rewarding endeavor that can breathe new life into cherished pieces.
With the right tools and materials, you can transform what may seem like discarded items into beautiful, functional furniture. Remember to take your time, enjoy the process, and don’t hesitate to experiment—the beauty of DIY is in the journey as much as the results. Now, armed with these must-have tools, you’re ready to tackle your next restoration project with confidence and creativity!
Note: We aim to provide accurate product links, but some may occasionally expire or become unavailable. If this happens, please search directly on Amazon for the product or a suitable alternative.
This post contains Amazon affiliate links, meaning we may earn a small commission if you purchase through our links, at no extra cost to you.
Frequently Asked Questions
What Are the Essential Tools for Vintage Furniture Restoration Every DIYer Should Have?
Getting started with vintage furniture restoration means equipping yourself with a core set of tools that handle most jobs. Start with hand essentials like a claw hammer, screwdrivers, chisels, scrapers, and a mallet; add clamps, a square, a sanding block, and an orbital or detail sander; keep brushes, rags, a dust mask or respirator, and safety gloves handy. For delicate veneers, include a veneer scraper and, if needed, a heat gun. Stock wood glue, filler, scrap wood, and quality sandpaper for quick fixes, and set up a well-lit workspace to stay organized.
How Should I Choose Materials and Finishes for a Vintage Piece to Preserve Its Character?
Selecting the right materials and finishes is crucial in vintage furniture restoration. Identify the wood and era, test finishes on a hidden spot, and lean toward era-appropriate options like shellac or lacquer for authenticity, with a protective topcoat. Use compatible fillers and conditioners to avoid raising grain or uneven color; test stain color first; wipe-on finishes can minimize brush marks. Remember to preserve patina whenever possible; sometimes light cleaning and a matching wax finish can keep the piece’s charm intact.
What Are Safe Ways to Remove Old Finishes Without Damaging the Wood?
Choosing a safe finish-removal method starts with knowing the type of finish you’re dealing with. For shellac or lacquer, consider a gentle chemical stripper or a warm, damp cloth; for tough coatings, a heat gun paired with careful scrubbing can work. Always work in a ventilated area, wear a respirator, and test on a hidden area. Use a veneer scraper on fragile surfaces and avoid aggressive sanding unless necessary to protect grain and edge details. After stripping, neutralize residue and wipe clean before refinishing.
What Common Mistakes Do Beginners Make in Vintage Furniture Restoration, and How Can I Avoid Them?
Common mistakes include over-sanding and removing too much patina, using the wrong glue on joints, ignoring veneer integrity, and mixing hardware from different eras. To avoid them, plan the project, test finishes on scraps, document original hardware, and choose period-appropriate materials and tools. Work slowly, clamp joints properly, and use wood glue for structural repairs instead of household adhesives. Finally, clean dust and maintain a stable workspace to keep your piece authentic.
How Do I Repair Structural Issues and Decide When to Repair vs. Replace?
Start by assessing joints, legs, and braces for looseness or cracks. Re-glue with a strong wood glue, add clamps, and reinforce with corner blocks or dowels when needed. If veneer is peeling, re-veneering or patching with matching wood is possible; if core wood is rotted or severely damaged, replacement panels might be necessary while preserving other elements. Always weigh value and historical significance; when in doubt, consult a pro. With careful repairs you can extend life without sacrificing integrity.
Related Topics
vintage furniture restoration
DIY tools
restoration techniques
home decor
upcycling furniture
beginner friendly
budget restoration
antique furniture
paint stripping
refinishing wood
sustainable decor
easy DIY projects
Wow, I love the list you put together! I recently tried restoring an old chair and ended up with paint all over my hands. What’s your favorite tool for those tricky spots?