


Halloween is creeping up and I want decor that is fun, easy, and kind to the wallet. I crave projects you can finish in an afternoon and that still feel spooky. So I put together 25 Spooktacular Halloween Decorations You Can DIY. Number 13 will shock you because it uses simple items in a clever way.
If you love hands on crafts, budget friendly projects, or decorating a cozy home, this is for you.
You’ll get 25 ideas that are easy, quick, and spooky. Each idea comes with simple steps and a small materials list. You can mix and match, reuse old items, and adjust to fit your space.
Think porch signs, table centerpieces, window silhouettes, and wall art. These ideas use items you likely have: cardboard, paper, fabric, glue, string, and LED lights.
Plan ahead and test ideas in daylight. Some ideas work outside, some indoors. Weather matters, so pick protected spots and keep kids and pets safe.
Next steps: pick a few favorites, gather supplies, and set a short build time this weekend. Start small with one project and let it grow into a mini Halloween scene you can tweak all season.
1. Creepy Mason Jar Lanterns

Need a quick, low-cost way to add spooky glow to your Halloween decor? Create creepy mason jar lanterns that shine softly all night.
– What you need: clean mason jars in different sizes, glass paint in black, orange, or purple, a black marker or Halloween paper for faces, and battery-operated tealights.
– Prep: wash the jars and dry them completely so the paint sticks and the glow shows.
– Make the lanterns: paint the outside, let coats dry, and draw simple faces or add cut-out paper for a haunted look.
– Light them: place a tealight inside each jar and use batteries for a safe, steady glow.
– Display ideas: cluster jars on steps, hang a few from tree branches, or line a porch with jars of different sizes to add depth.
– Finishing touches: tuck fake cobwebs around the jars, tie twine to hang them, and set a couple on a tray with small Halloween props.
Next steps: test a few designs, switch colors for different moods, and reuse the jars for other fall events.
1. Creepy Mason Jar Lanterns
Editor’s Choice
![Wide Mouth Mason Jars 16 oz [5 Pack] With Mason Jar Lids and Bands, Maso...](https://m.media-amazon.com/images/I/81jo+KgW1yL._AC_UL320_.jpg)
Wide Mouth Mason Jars 16 oz [5 Pack] With Mason Jar Lids and Bands, Maso…

FolkArt Gloss Finish Acrylic Enamel Craft Set Designed for Beginners and…

KOABY 12 Pack LED Tea Lights, Flickering Warm White Lights, Battery Oper…
2. Ghostly Cheesecloth Figures

Need fast Halloween decor that feels spooky but is easy on you. Ghostly cheesecloth figures float with little fuss. Here is why they work for any space: they aren’t bulky, they catch light softly, and you can customize them in minutes.
Materials
– Cheesecloth, large pieces
– A balloon and string
– Clear fishing line or lightweight thread for hanging
– Fabric paint or markers for eyes, or small felt scraps
– A stiffener mix (glue and water, or diluted cornstarch)
– Optional: glow-in-the-dark paint
Steps
– Inflate the balloon to your preferred size and tie it off.
– Drape a large sheet of cheesecloth over the balloon. Let the cloth hang to form a full body.
– Apply the stiffener to the cloth. Brush it on or dip and squeeze out excess.
– Let the ghost dry completely. When dry, pop the balloon and slip out the core.
– Gather the top to make a head and knot to form a neck. Pinch the cloth to shape a floating silhouette.
– Add a face with fabric paint or a small felt patch.
Hang and finish
– Tie a length of fishing line to the top and hang from a ceiling, doorway, or tree branch.
– For a wow effect, use glow-in-the-dark paint on the face.
– Place a few ghosts at eye level and one larger figure near the doorway to guide the eye.
– Leave a bit of space so the figures sway with the air.
Quick tips
– If the glue makes the cloth stiff, use less water next time.
– Keep them away from open flames and candles.
2. Ghostly Cheesecloth Figures
Editor’s Choice
Trimaco 10303 Absorbent Deluxe Cheese Cloth,Virgin Cotton Fiber, 4 sq yd…
Tulip Puff Glow In The Dark Fabric Paint, Permanent Craft Paint for Clot…

Clear Fishing Wire, Acejoz 656FT Fishing Line Clear Invisible Hanging Wi…
3. Pumpkin Planters

You want Halloween decor that’s easy and warm. DIY pumpkin planters fit the bill. They add fall color with a touch of spooky charm.
Here is how to do it.
– Start with a medium pumpkin. Cut the top off to form a lid. Scoop out the insides. Save the seeds for roasting or composting.
– Fill the hollow with potting soil. Pack the soil so the flowers stay firm.
– Plant fall flowers that hold up outdoors. Chrysanthemums and ornamental cabbage are sturdy choices.
– Place the pumpkin on a tray or saucer. This catches water and protects your porch.
– Position the planters on your porch, steps, or along a path. They give a rustic, friendly feel for Halloween.
– After the season, compost the pumpkin. It cuts waste and feeds your soil.
Next steps to mix it up:
– Use different sizes and colors for variety.
– Add a spooky sign beside each planter for a personal touch.
– Swap in faux flowers if you want zero maintenance.
These pumpkin planters brighten the yard and invite guests to stop and smile. They offer a simple eco-friendly way to welcome fall and Halloween. Plus, compost the shell and seeds after the season.
3. Pumpkin Planters
Editor’s Choice

Miracle-Gro Potting Mix, For Container Plants, Flowers, Vegetables, Annu…

Live Flowering Hardy Chrysanthemum – Purple – Colorful Fall Mums – 15″ T…

Mr. Pen- Plastic Growing Trays, 5Pack, Black, 17×10, Plant Tray, Seed Tr…
4. Spider Web Tablecloth

Want a quick, eye-catching Halloween table setup? Try a spider web tablecloth.
Picture it: a dark table, a web of white threads catching a glint of light, and little spiders marching along. Here is how to make it.
– What you need:
– Black tablecloth as the base
– White yarn or thick string
– Tape or pins to secure
– Plastic spiders for a creepy crawl
– Glow-in-the-dark yarn for a subtle glow (optional)
– Steps:
– Drape the black cloth on the table and smooth it flat
– Start at the center and pull a spoke outward with yarn
– Add a loose spiral to connect the spokes
– Secure every strand with tape or pins so it stays flat
– Keep the yarn taut but not tight for a clean look
– Boost the mood:
– Place a few spiders along the web to create a sense of movement
– Use glow-in-the-dark yarn to let the web glow after lights out
– Try purple and green yarn for a fun twist
– Cleanup tip:
– Layer a plain tablecloth underneath; lift the top layer when you’re done for easy cleanup
– Tips and notes:
– If a strand slips, re-pin it and keep going
– This look works on dining tables, kitchen islands, or party buffets
This spider web tablecloth decor instantly elevates Halloween dining without a lot of effort.
4. Spider Web Tablecloth
Editor’s Choice

sancua 2 Pack Black Tablecloth 60 x 102 Inch, Rectangle 6 Feet Table Clo…
Plastic Spiders Halloween, 100 PCS Black Fake Spiders Halloween Decorati…

Lion Brand Yarn, DIY Glow Cozy, Glow in The Dark Yarn for Crocheting, Kn…
5. Skeleton Garland

Want to lift your Halloween mood without a big budget? A skeleton garland is easy to make and sure to catch the eye.
Here is why it shines: simple pieces, quick build, big impact.
What you’ll need
– Materials include black cardstock or ready-made skeleton shapes.
– You need scissors, a hole punch or needle, twine or fishing line.
– Tape or clips hold it in place; glow paint adds glow.
– Optional markers let you add short messages on each bone.
Steps
– Cut out simple skeleton shapes or use the pre-made designs you bought.
– Punch holes at the top of each bone and thread it onto the twine.
– Space the bones evenly so the garland hangs straight.
– Write small phrases like Boo or Spooky on a bone to personalize it.
– Apply glow-in-the-dark paint and let it dry fully.
– Drape the garland across a mantle, over a doorway, or along a porch railing.
Tips
– Keep the garland light so it stays taut.
– Measure your space first to decide garland length.
– Create two shorter garlands for more display spots.
This skeleton garland brings a playful spooky vibe that guests notice at a glance. Next steps: gather your supplies and start today.
5. Skeleton Garland
Editor’s Choice

Astrobrights Color Cardstock, 65 lb Cover Weight, 8.5 x 11, Eclipse Blac…
FolkArt glow in the dark paint, 8 oz, Green 8 Fl Oz

Vanhench 805FT Natural Jute Twine String, Bulk Hemp Jute Rope Cord Twine…
6. Haunted Mirror

Want a centerpiece that wows guests and doubles as a photo backdrop? A haunted mirror is a smart, simple pick you can DIY in minutes.
What you’ll need
– A mirror you can frame or dress up
– Black spray paint for the edge frame
– Plastic spiders and fake cobwebs
– Washable markers for writing messages
– A fog machine or safe fog option
– Optional: a dim backlight or LED strip for a glow
How to build it
1) Prep the mirror. Clean it well and decide where the extra decorations will sit.
2) Edge the glass. Lightly spray the outer edge with black paint to create a dark frame. Let it dry.
3) Add texture. Drape cobwebs across the top corners and perch a few spiders for creep factor.
4) Create fog drama. Place the fog machine a short distance in front of the mirror so the mist rolls across the glass.
5) Write a message. Use washable markers to scribble a line that only shows when the fog comes in. Test it by fogging the mirror and wiping it clean to reveal the note again.
6) Light it up. A soft glow from behind the mirror makes the fog glow and the scene feel eerie.
7) Test and tweak. Check visibility, safety, and how the room looks from different angles. Adjust as needed.
8) Capture it. Use the mirror as a focal point for party photos and quick video clips.
Pro tips
– Place the setup where guests will gather for photos.
– Keep markers on hand for quick updates as the night goes on.
– Ventilate the space after using fog to keep air comfortable.
Your haunted mirror gives a chilling, memorable vibe without a ton of work. Guests will pause, snap pics, and talk about the unseen guests lingering in the glass.
6. Haunted Mirror
Editor’s Choice

Rust-Oleum 334020 Painter’s Touch 2X Ultra Cover Spray Paint, 12 oz, Fla…

AGPTEK Fog Machine, Smoke Machine with 13 Colorful LED Lights Effect, Au…

KSIPZE 100ft Led Strip Lights RGB Music Sync Color Changing Bluetooth Le…
7. DIY Witch’s Broom

You want Halloween décor that feels magical but is easy to make. This DIY Witch’s Broom fits the bill. It’s cheap, kid friendly, and you can reuse it next year. Here is why it helps your home feel welcoming: it adds a playful, spooky charm without a big mess.
Materials
– A bundle of dry twigs or small branches
– A long stick for the broom handle
– String or twine
– Scissors or shears
– Optional decor: autumn leaves, ribbons in your color, tiny charms, glow‑in‑the‑dark accents
Steps
1. Gather dry twigs and trim them to even length.
2. Lay the twig bundle at the end of the handle and wrap tightly with string.
3. Tie a secure knot and trim loose ends.
4. Shape the broom head by trimming the tips for a neat, fan-like finish.
Decorating ideas
Add autumn leaves, ribbons, and little charms. Try glow‑in‑the‑dark paint or tape on the tips. Pick a Halloween palette—orange, black, and purple—to tie the look together. You can spray a light coat of clear sealant to help the colors last.
Display tips
Hang the broom by the door or from a porch beam. You can place one by the entry and another in the yard for extra whimsy. If rain is coming, bring it inside to protect the twigs.
Next steps: make a pair for a matching set, or vary the colors for different rooms. This craft stays affordable and fun while boosting your Halloween vibe.
7. DIY Witch’s Broom
Editor’s Choice

PerkHomy Natural Jute Twine 600 Feet Long Twine String for Crafts Gift W…
FolkArt glow in the dark paint, 8 oz, Green 8 Fl Oz

Mod Podge Spray Acrylic Sealer that is Specifically Formulated to Seal C…
8. Bloody Handprint Window Clings

If you want a spooky look on your windows with little mess, try Bloody Handprint Window Clings. You make clear stencils from contact paper, fill them with red paint or gel, wait for them to dry, then peel them off and stick them on your glass.
Here is why this works: it sells the fear factor without staining your walls, and you can move the clings later.
Next steps are simple.
Materials
– Clear contact paper for stencils
– Red washable paint or gel
– Scissors or a craft knife
– Optional: extra shapes like footprints or tiny ghost messages
Steps
– Cut hand shapes from the contact paper to make templates
– Dab red paint inside each hand area
– Let the paint dry fully so the color won’t smudge
– Peel the shapes off the backing and press them onto your windows
– Space and rotate them to create a small story on glass
Tips and variations
– Use a mix of hand sizes for a more eerie look
– Add footprints or a short message to heighten creep factor
– Try mirrors or glass doors for extra shimmer
Care and cleanup
– Use washable paint so you can remove the clings easily after Halloween
– To remove, peel gently and wipe any leftover paint with a damp cloth
These handprints will grab attention on a Halloween neighborhood tour.
8. Bloody Handprint Window Clings
Editor’s Choice
Chell Clear Contact Paper Roll for Books, 17.5 in x 5 ft Clear Self Adhe…

Fiskars All Purpose Scissors, High Performance Cutting, Stainless Steel …
9. DIY Scarecrow

A friendly scarecrow can greet guests at your Halloween party this year. It’s a simple DIY project you can finish with the whole family.
– Gather the basics: old clothes, straw for stuffing, a wooden post for the frame, and a burlap sack or old pillowcase for the face. You can add a scarf or patchy fabric for extra character.
– Add finishing touches: a straw hat, a pumpkin head, or a sign that says Happy Halloween or Beware. Small details make the look pop from the curb.
– Build the frame: plant the post firmly in the ground and drape the clothes around it. A steady base helps it stand tall in wind.
– Stuff for shape: push straw into sleeves and the torso until the figure holds its pose. Tuck in the seams to keep a clean silhouette.
– Create the face: cut the sack to fit over the head and paint friendly eyes, a nose, and a smile with non-toxic paint. Keep colors bold and cheerful.
– Secure every piece: tie the clothes to the post and use rope or zip ties so wind won’t loosen any part. Check the seams after a light gust.
– Place it where guests will notice it: near the gate, by the front porch, or beside a pumpkin patch for extra charm.
Next steps: swap outfits for quick makeovers, add a small solar light for nighttime glow, and spray a weather seal to help it last through the season.
9. DIY Scarecrow
Editor’s Choice

Shuttle Art Acrylic Paint Set, 15 x 12ml Tubes Artist Quality Non Toxic …

GIGALUMI Solar Lights Outdoor Waterproof, 6 Pack LED Solar Garden Lights…

Flex Seal, 14 oz, Clear, Stop Leaks Instantly, Transparent Waterproof Ru…
10. Halloween Wreath

You want a front door that says Halloween without shouting. A wreath is a simple project that makes a big first impression. It can set the mood before guests step inside.
– Materials
– Foam or straw wreath base
– Black or orange fabric to wrap the base
– Faux spiders, mini pumpkins, and autumn leaves
– Spooky lace or tulle for texture
– A bright bow
– LED string lights for a glow at night
– Optional: a small sign with your family name or a Halloween message
– Steps
1) Start by securing the fabric around the base. Wrap it tight so it sits clean.
2) Place decorations in a balanced layout. Use glue or pins so they stay put.
3) Layer lace or tulle to add a spooky texture. Let some pieces hang for movement.
4) Tie on a bold bow. Choose a color that pops against the wrap.
5) Drape LED lights around the ring. Keep cords tucked so they look neat.
6) Add a sign or name plate if you like. Keep it small and readable.
– Finishing tips
– Try purple and green accents for a modern twist.
– Place the wreath where it’s visible from the street and door approach.
– Use weather-friendly materials so it lasts the season.
This wreath welcomes guests and sets the mood for a fun, safe Halloween.
10. Halloween Wreath
Editor’s Choice

Juvale Foam Wreath Form – 12 x 12 x 2 in, Pack of 3, White – Foam Wreath…

Minetom Fairy Lights Plug in, 33Ft 100 LEDs Waterproof Silver Wire Firef…
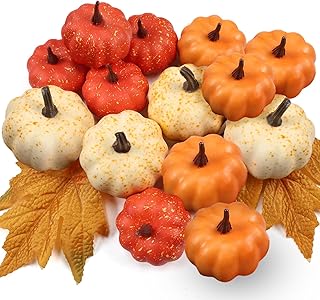
16PCS Artificial Mini Fake Pumpkins Set,Foam Plastic Pumpkins with Fall …
You might also like


11. Spooky Centerpiece

You want a centerpiece that grabs attention at your Halloween party. A spooky focal point sets the mood and keeps guests talking. Here is a simple, practical way to craft one that looks polished and not busy.
– Base and container – Pick a large glass bowl or a tall vase. The size guides how much you can fit. Keep the opening wide for easy angle shots and quick restocking.
– Spooky items – Fill it with fake eyeballs, plastic spiders, mini skeletons, and even candy. Mix textures so it feels alive from across the room.
– Lighting for mood – Add a few LEDs or a pair of candles in safe holders. A soft glow makes the figures stand out and casts eerie shadows.
– Webs and texture – Drape cobwebs around the pieces. Let strands catch the light and stretch between items for depth.
– Depth and height – Use items at different heights. Put a tall element in the back, shorter pieces in front, and a few items on small risers.
– Color balance – Choose two main colors like black and orange or purple with orange. Keep accents limited for a cohesive look.
– Safety tips – If you use real candles, keep them away from fabric and kids. Use LED candles when possible.
– Finishing touches – Scatter a few candy pieces around the base. A light spray of fake cobweb dust ties the scene together.
This centerpiece will wow guests, fit any table size, and boost the Halloween vibe at your gathering.
11. Spooky Centerpiece
Editor’s Choice

Pyrex Sculpted (3-Pack) Glass Mixing Bowls Set With Lids For Prepping, B…

Amagic 12/24/50/100/150Pack Flameless LED Tea Lights Candles Battery Ope…

Happy Hippo Halloween Spider Web Decoration, 200 Sqare Feet & Plastic Sp…
12. Caution Tape Decor

Halloween mood in minutes? Yes. Caution tape decor delivers a crime scene vibe that you can DIY right now. It’s easy, budget friendly, and adjustable for any room.
– Supplies you need
– Yellow caution tape for the main look.
– Black tape to create a bold base.
– Scissors and a marker for clean lines and labels.
– Optional: fake police props or skeletal figures to finish the scene.
– Quick setup steps
– Step 1: Choose a doorway or banister as your focal point.
– Step 2: Run black tape along edges to frame the space.
– Step 3: Layer yellow caution tape over the frame in straight stripes or a zigzag pattern.
– Step 4: Write Keep Out or Danger with a marker for extra punch.
– Step 5: Add a small prop, like a skull or handcuffs, to set the mood.
– Style ideas
– Keep it minimal with clean lines for a chic crime-scene look.
– Go bold by wrapping several doors or a piece of furniture for a full effect.
– Mix in a few fake police signs to deepen the theme without clutter.
– Tips for best impact
– Plan your layout first so you don’t overshoot a doorway or trap a path.
– Use removable tape on walls to avoid damage and make the scene easy to erase.
– Layer different tape widths to add depth and texture.
– Why it works
– This approach is quick, versatile, and safe for most living spaces.
– It pairs well with other Halloween decor ideas and modern setups.
– You can scale the look up or down to fit your home and mood.
Transform your home into a spooky scene in just moments! With simple supplies and a little creativity, your DIY Halloween decorations can scream fun and fright!
12. Caution Tape Decor
Editor’s Choice

ATERET Premium Yellow Caution Tape I 3 inch x 1000 feet I Harzard Tape w…
Gaffer Tape 2 Inch x 1 Pack Black Gaffing Tapes, Heavy Duty No Residue, …
13. Shocking Bloody Footprints

If you want a quick scare that sticks with guests, try bloody footprints guiding them to your front door. It’s bold but doable. You control the look, the mess, and the cleanup.
– Materials
– Red washable paint or safe fake blood
– Old clothes and a damp cloth for quick changes
– A simple sign like “Follow the trail if you dare”
– A clear path from the sidewalk to your door
– How to lay the trail
– Start with clean feet. A quick rinse helps keep prints neat.
– Dip your feet only lightly in the paint. You want prints, not a splash.
– Step slowly along a straight or curved line from sidewalk to door.
– Leave prints on the ground or mat for an authentic look. Keep the pace natural.
– Story cue
– Place the sign at the trail’s start so guests see it early.
– A single sentence can set the mood. Try “Follow the trail if you dare” in bold letters.
– Safety and cleanup
– Use washable materials to make cleanup easy.
– Test a small area first to avoid stains on surfaces you can’t wash.
– Wipe feet and remove prints after Halloween is over. A hose or wet cloth works well.
– Tips to boost impact
– Pair red prints with a dark porch rug for contrast.
– Vary print sizes to mimic different footwear.
– Add a few random smudges on steps or railings for realism.
This spooky path creates a thrilling moment as trick-or-treaters approach your home. It’s playful, simple, and easy to remove when the night ends.
13. Shocking Bloody Footprints
Editor’s Choice

BOBISUKA 3PCS Halloween Fake Blood Makeup Kit – Coagulated 1.41oz + Spra…
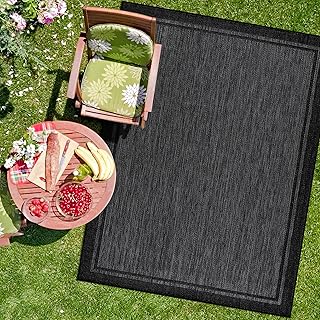
CAMILSON Indoor Outdoor Rug, 5×7 Bordered Dark Grey Black Modern Area Ru…
14. Mini Pumpkin Vases

You want a Halloween look that feels cozy, not busy. Mini pumpkin vases give that charm in a quick DIY. Here’s how to pull it off.
– Choose small pumpkins. Pick smooth, petite pumpkins that are easy to hollow.
– Create a hollow. Cut off the tops. Scoop out the inside. Rinse quickly.
– Add a water source. Slip in a tiny floral tube or a water-filled bag to hold the stems upright.
– Fill with fall blooms. Use daisies, sunflowers, mums, or asters. Mix colors for a bold, cheerful look.
– Arrange and place. Set them on a dining table, mantel, or windowsill. The orange shells glow with the bright flowers.
– Try variations. Use faux flowers for long life. Paint the pumpkins in black, ivory, copper, or green to match your decor. Tie a ribbon or twine for a finishing touch.
Mini pumpkin vases are a sweet, seasonal accent. They work as table centerpieces or home accents. Quick to make, easy to store, and fun to reuse next Halloween.
Once you try this, you can add more colors and sizes to fit any room. It’s simple, fast, and fun to reuse next year.
14. Mini Pumpkin Vases
Editor’s Choice
16PCS Artificial Mini Fake Pumpkins Set,Foam Plastic Pumpkins with Fall …

Vials for Flower Arrangements 2.8 Inch Floral Water Tubes Plastic Floral…

Beige Fake Flowers Silk 10 Stems With Eucalyptus, Faux Flowers For Vase,…
15. Spooky Silhouettes

You want quick, easy DIY Halloween window decorations that make people look twice. Spooky silhouettes do that with little work.
Here is why they work: when you turn on inside lights, the shapes cast sharp shadows outside. You get a creepy scene without messy painting.
Next steps:
– Materials you need: black construction paper or card stock, scissors, tape or removable mounting putty, and a ruler for clean cuts.
– Pick shapes: bats, witches, ghosts, and a moon. Mix sizes to add depth.
– Cut and arrange: cut several shapes. Vary the spacing. Place a few near the edges and a few toward the center for a layered look.
– Attach to the window: use clear, low-tack tape. Keep the shapes flat to create clean shadows.
– Create drama with color: put a colored light behind the silhouettes or tape tinted tissue behind the glass. A blue glow adds a chilly feel; red can hint at a fiery night.
– Lighting setup: do this after dark for the best effect. Inside light on, outside shadow strong.
– Quick tips: test one piece first to see how it reads from the street. If you misplace something, peel it off and rehang.
– Storage and care: save the shapes flat in a folder so you can reuse them next year.
Next steps: rotate shapes to keep the display fresh and share photos to inspire neighbors.
15. Spooky Silhouettes
Editor’s Choice
Prang (Formerly SunWorks) Construction Paper, Black, 9″ x 12″, 50 Sheets
Feosky Adhesive Poster Sticky Tack Putty, Reusable and Removable Adhesiv…

ILC RGB LED Color Changing Light Bulb, 40W Equivalent, 450LM, 2700K Warm…
16. Halloween Tree

You want a fun, eye catching decor that uses your Halloween crafts. A Halloween tree gives you a small, reusable display that brightens a room without a lot of fuss.
– Choose a bare branch or a sturdy, tree shaped base. Attach it to a weighty pot, a mason jar, or a small planter so it stands tall.
– Decor with spooky ornaments. Think bats, mini pumpkins, glitter ghosts, and tiny skulls. You can also hang candy or Halloween treats.
– Build a cohesive look. Pick two or three colors like orange, black and purple. Use one color for most ornaments, and a second color for accents.
– Add variety in height. Put tall pieces at the back, little ones in front. Layer different sizes to create depth.
– Light it up. String a small set of warm lights around the branches for a soft glow. You can also place a lantern nearby for extra mood.
– Place it where people will see it, on a console, porch, or entryway.
– Next steps. Keep the display simple to start, then add one new ornament each week of October if you want.
– A Halloween tree is a playful centerpiece that blends crafting with cozy, spooky vibes.
16. Halloween Tree
Editor’s Choice
Halloween Wooden Ornaments for Tree Both Side, 24 Pcs Printing Halloween…

TW SHINE Purple and Orange Halloween Lights, 20FT 100 Count Incandescent…

Crayola Construction Paper – 480ct (2pck), Bulk Teacher Supplies, Back t…
17. Floating Witch Hats

Want a Halloween display that feels magical without crowding your space? Floating witch hats add motion and charm, with little effort. Here is why this idea works: the hats drift in the air and cast playful shadows across walls and ceilings. Let’s break it down.
What you’ll need
– Black witch hats in a few different styles and sizes
– Clear fishing line or fine nylon thread
– Small ceiling hooks, wall anchors, or sturdy outdoor branches
– Battery-operated fairy lights (optional for a warm glow)
– Scissors and a pencil
How to set it up
– Tie a small loop at the top of each hat to hold the line
– Thread the line through the hat’s top and secure it with a knot
– Attach the other end to a hook, nail, branch, or beam
– Hang hats at different heights for a dancing, magnetic look
– Space them so they don’t tangle; aim for 6 inches to 2 feet vertical gaps
Tips to shine
– Mix tall and short hats for variety
– Slip battery lights inside for a soft glow that shines through fabric
– Drape hats near corners or under archways to boost drama
– Keep lines slim and hidden where you want the magic to feel unseen
Safety and setup notes
– Use weather-safe line if you hang outdoors
– Check that lines are taut so a breeze won’t swing hats into walls
– Do a quick test before guests arrive to ensure stability
Next steps: gather hats, pick spots, and test the float ring. Your space will feel instantly spookier and more playful.
17. Floating Witch Hats
Editor’s Choice

6Pcs Halloween Decorations, Black Witch Hats for Halloween Porch Decor, …
Clear Fishing Wire, Acejoz 656FT Fishing Line Clear Invisible Hanging Wi…

Brightown 12 Pack LED Fairy Lights Battery Operated String Lights – 7ft …
18. DIY Tombstones

Want a haunted yard without a big cost? DIY tombstones are fast, simple, and fun to build. Here is why they work and how you can do them today.
– Materials:
– Foam boards or thick cardboard
– Gray or brown paint, plus white for letters
– Stencils or freehand for epitaphs
– Optional glow-in-the-dark paint
– Fake cobwebs and plastic skeletons
– A marker, ruler, and tape to shape and place stones
– Steps:
1) Cut tombstone shapes from foam or cardboard. Make each one a different size for a natural look.
2) Paint the fronts with a base coat of gray or brown. Add darker shading along the edges.
3) Add epitaphs. Use a stencil or write short lines that mix spooky and funny.
4) Let the paint dry. If you have glow paint, add letters that glow at night.
5) Place the stones around your yard in a loose graveyard pattern. Hide a few stones behind bushes for a quick surprise.
6) Toss a few fake cobwebs on the edges and tuck in plastic skeletons to peek out.
7) Create a tiny story corner. A sign or small note can hint at a tale visitors can follow.
8) Light the scene softly with low solar lights or lanterns so it reads clearly after dark.
– Tips for impact:
– Keep inscriptions short. A punch line or pun adds humor.
– Vary stone shapes and heights for depth.
– Place stones along paths so guests encounter them as they wander.
Next steps: set up a mini graveyard once the sun goes down and enjoy the eerie glow. These DIY tombstones will lift the Halloween vibe in your yard with little effort and big smiles.
18. DIY Tombstones
Editor’s Choice

FolkArt glow in the dark paint, 8 oz, Green 8 Fl Oz

1000 sqft Spider Webs Halloween Decorations Bonus with 30 Fake Spiders, …
You Might Also Like


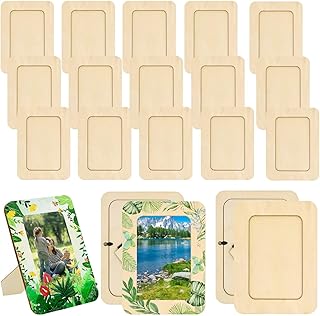
19. Scary Photo Frames

You want a quick, low-cost way to give your space a Halloween vibe. Scary photo frames do that by turning simple pictures into haunted keepsakes. Start with old wooden frames. Clean them, then sand rough edges so they look aged.
Next, choose a dark paint. Black, charcoal, or deep burgundy works well. Apply one to two coats. Let it dry fully.
Add small spooky touches. Plastic spiders, fake blood drops, or torn fabric add texture. A tiny skeleton charm or a rusted key can spark mystery. Keep the look tied to one color family so it feels intentional.
– Use frames in different sizes and shapes for visual drama.
– Swap photos to creepy portraits or grainy, old-time pics.
– Add seasonal accents inside the frame, like a crow, a spider web, or a dry leaf.
Display ideas. Line a mantel with a row of frames. Hang a gallery wall in a hallway. Set a few on a dining table with a candle nearby. Rotate the photos to keep the scene fresh.
Benefits. These frames bring a personal touch and a chill without a big decor overhaul. They are easy to change, budget-friendly, and simple to store when the season ends.
Transform your favorite memories into spooky masterpieces! Scary photo frames are a fun DIY that adds a hauntingly chic vibe to your Halloween decorations without breaking the bank.
19. Scary Photo Frames
Editor’s Choice
RYKOMO 20 Pack Wooden Picture Frames for Crafts, 4 x 6 Inch DIY Wood Pic…

Apple Barrel Acrylic Paint in Assorted Colors (8 Ounce), 20404 Black- (P…

Halloween Hanging Witch Hats & Costume Accessories, 328 FT Nylon Cord Wi…
20. Halloween-Themed Throw Pillows

You want a cozy Halloween vibe without a big project. The trick is simple pillow covers and smart decor. You can switch looks fast and keep the room comfy.
What you’ll need
– Plain pillow covers and a pillow insert
– Fabric paint or iron-on transfers
– Glow-in-the-dark fabric paint (optional)
– A few textures like cotton, velvet, or burlap
– Pencils or chalk for outlines
How to get started
– Pick three colors: orange, black, and purple.
– Draw a quick design on scrap paper. You can do jack-o-lanterns, ghosts, or bats.
– Lightly sketch the design on the pillow cover. If you use transfers, place them where you want.
– Apply paint or heat-set transfers. Let each layer dry before adding more.
– For a spooky night look, dab glow paint on eyes or pumpkin faces. It shines under dim light.
Add design ideas
– A row of tiny jack-o-lantern faces
– A friendly ghost with a floating sheet
– A shy bat silhouette creeping along the seam
Care and reuse
– Choose covers that can be washed. Turn Halloween pieces into fall decor after the season.
– Mix textures so the pillows stay interesting. A velvet pillow next to a knit one reads cozy, not spooky.
Next steps
– Put the covers on and arrange them for a warm, festive living space.
Elevate your Halloween decorations with just a few cozy throw pillows! Quick designs and vibrant colors can transform your space into a festive haven without the fuss.
20. Halloween-Themed Throw Pillows
Editor’s Choice

Juvale Canvas Covers for Throw Pillows – 17 x 17 in, Cream, Pack of 4, C…

Shuttle Art Fabric Paint, 18 Colors Permanent Soft Fabric Paint in Bottl…
Tulip Puff Glow In The Dark Fabric Paint, Permanent Craft Paint for Clot…
21. Ghoulish Garland

Want a quick, spooky touch for Halloween? A ghoulish garland is simple to make and easy to place.
Materials
– Black paper, felt, or fabric shapes for a dark backdrop.
– Twine or a long ribbon to string the shapes.
– Scissors and a simple hole punch or needle.
– Optional small battery lights for night glow.
– Accent colors like orange and purple to make the garland pop.
How to make it
– Cut ghost, bat, or skull shapes. Keep the shapes bold and easy to cut.
– Layer felt or fabric for extra texture, then glue or stitch if you like.
– Punch holes or sew a small loop at the top of each shape.
– Thread shapes onto twine, leaving even space between them.
– Hang across a mantle, a doorway, or along a yard fence.
Tips to boost the effect
– Mix textures to add depth.
– Add a string of tiny lights so the garland shines at night.
– Let kids design their own ghouls for a fun family project.
Why this works
– It fits any space.
– It costs little and feels festive.
– It’s easy to store after Halloween.
Next steps: place the garland where people can see it, and enjoy the eerie charm. Change shapes each year to keep it fresh.
21. Ghoulish Garland
Editor’s Choice

HaoFeiJH Black Felt Fabric Sheets – 6PCS Felt Squares – 8×12 1 Colors So…
PerkHomy Natural Jute Twine 600 Feet Long Twine String for Crafts Gift W…
Brightown 12 Pack LED Fairy Lights Battery Operated String Lights – 7ft …
22. Halloween Cookie Decorating Station

You want a Halloween activity that’s easy for kids and adds to the look of your home. A cookie decorating station fits. It blends fun with festive decor. Set it up where guests can gather and chat while decorating.
– Choose shapes of cookies. Pick bats, ghosts, pumpkins, or witches hats. Use pre-baked cookies for quick setup.
– Line up supplies. Have frosting in several colors, piping bags or spoons, and a range of sprinkles. Add edible glitter for tiny pops of shine, if you like. Place everything on a clean tray or mat.
– Arrange the display. Show cookies on a tray, a tiered stand, or a long baking sheet. Let colors pop against a dark tablecloth or spooky-themed runner.
– Add fun touches. Place mini skeletons or cauldrons filled with candy nearby. These small decorations pull the scene together and spark ideas.
– Run a quick contest. Invite guests to vote for the best decorated cookie. Give a simple prize like a small treat bag or a spooky sticker.
Next steps: keep the decorating simple. Offer 3 or 4 color options and a few shapes. That keeps lines moving and smiles flowing. A Halloween cookie station adds a sweet, memorable touch to your party.
22. Halloween Cookie Decorating Station
Editor’s Choice

Halloween Cookie Cutters Set,9 Piece Stainless Steel Metal Halloween Coo…

Food Coloring Set – 12 Color Food Grade Vibrant Food Dye Tasteless Liqui…

Manvscakes Halloween Sprinkles – Sprinkles For Cake Decorating, Edible T…
23. Eerie Lanterns Hanging from Trees

If you want a spooky yard that feels inviting yet full of mystery, try eerie lanterns hanging from trees.
What you need
– Mason jars or paper lanterns
– LED fairy lights or string lights
– Battery packs or solar options
– Clear fishing line or thin twine
– Optional outdoor paint in orange, purple, or black
– Stickers or chalk for spooky shapes
How to set them up
– Clean each jar and add your color accents. Let it dry so the glow stays clear.
– Place warm LED lights inside. Use battery power or solar lights that stay bright after dusk.
– Tie lines to branches and hang lanterns at different heights. Test the pulls so nothing sags.
– Create a glow path along a walkway to guide guests.
Style ideas
– Paint jars or wrap them with spooky decals for variety.
– Mix mason jars with paper lanterns for different textures.
– Use flameless scented lights if you want a gentle autumn scent.
Safety and upkeep
– Pick outdoor-rated lights and keep cords off the ground.
– Check lines after wind. Bring lanterns indoors during storms.
– Scout the area at dusk and tweak heights for even lighting.
Next steps: place a few lanterns at the yard’s edge, test at sundown, adjust heights, and enjoy the eerie glow.
23. Eerie Lanterns Hanging from Trees
Editor’s Choice
Wide Mouth Mason Jars 16 oz [5 Pack] With Mason Jar Lids and Bands, Maso…

Minetom Color Changing Fairy String Lights – 33 ft 100 LED USB Silver Wi…

addlon 54FT(48+6) Solar String Lights Outdoor Waterproof with USB Chargi…
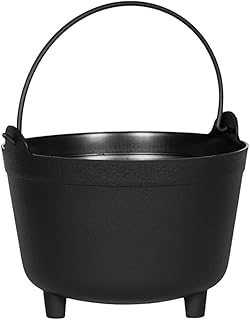
24. DIY Cauldron Planters

If you want a quick Halloween yard touch that won’t break the bank, try DIY cauldron planters. They bring witchy charm to your outdoors and are easy to make.
What you need
– Old cauldrons or black buckets.
– Outdoor paint and brushes.
– Potting soil and fall plants like mums or kale.
– LED candles or solar lights for night glow.
– Faux potion bottles and stickers for mood.
How to set them up
– Clean and dry the containers before you paint.
– Paint with a dark base and add a spooky design, such as bats or spiderwebs.
– Fill with soil and plant the flowers or herbs.
– Arrange the planters around your porch or garden edge.
Tips for more mood
– Place faux potion bottles around the cauldrons for a magical vibe.
– Mix plant colors and textures for visual interest.
– Use LED options if you want light after dark; avoid open flames near plants.
Care and timing
– Water as needed and trim spent blooms.
– Swap in new fall plants when the season changes.
– Remove or repurpose the planters after Halloween if you want.
These cauldron planters bring a witchy touch to decor. They’re easy to move and reuse. Start with one and add more as you go.
24. DIY Cauldron Planters
Editor’s Choice
Root & Vessel Antique Kettle Planter, Black, 15-Inch

Magicfly Outdoor Acrylic Paint, Set of 30 Colors/Tubes (60 ml, 2 oz.) wi…

GIGALUMI Solar Lights Outdoor Waterproof, 12 Pack, Stainless Steel LED S…
25. Whimsical Bat Wall Art

What you’ll need
– Black construction paper in many sizes
– Scissors
– Double-sided tape or removable mounting strips
– White chalk or a fine white marker
– Glow-in-the-dark paint or markers (optional)
Make the bats
Cut out a dozen or more bat silhouettes. Use simple shapes for easy cutting. Vary the sizes to add depth. Give each bat small wings or pointed ears for character. Keep edges crisp so they look clean on the wall.
Plan your gallery
Lay bats on the floor to test a pattern. Try irregular clusters and a zigzag path. A mixed layout feels lively and playful. Once you love the look, you can recreate it on wall.
Attach and adjust
Stick bats to the wall with tape. Start at the edges and work inward. Tap the pieces gently to set them. If you want easy changes, use removable strips.
Add a glow twist
Paint a few bats with glow-in-the-dark paint. In daylight they stay sleek. At night they glow softly for mood lighting.
Mix and match
Combine with other Halloween shapes like moons or ghosts. A themed wall makes a bigger statement.
Care and reuse
Use tape that comes off cleanly and won’t peel paint. Save your bats for next year by storing flat in a sleeve.
What’s next? Try a small test wall this weekend. Your guests will love the friendly spooky vibe.
Transform your space with a dash of creativity! DIY whimsical bat wall art not only brings Halloween spirit to life but also creates a hauntingly beautiful gallery. Who knew a little construction paper could be so spooktacular?
25. Whimsical Bat Wall Art
Editor’s Choice
FolkArt glow in the dark paint, 8 oz, Green 8 Fl Oz

EZlifego Double Sided Tape Heavy Duty, Nano Double Sided Adhesive Tape, …
Crayola Construction Paper – 480ct (2pck), Bulk Teacher Supplies, Back t…
Conclusion

With these 25 spooktacular Halloween decorations, your home will be the envy of all the ghosts and ghouls in the neighborhood! From eerie lanterns to whimsical bat wall art, there are plenty of creative ways to embrace the spirit of Halloween without breaking the bank.
So roll up your sleeves, gather your supplies, and let’s get crafting! Don’t forget to share your favorite DIY projects and tips with friends and family for an even spookier celebration. Happy haunting!
Note: We aim to provide accurate product links, but some may occasionally expire or become unavailable. If this happens, please search directly on Amazon for the product or a suitable alternative.
This post contains Amazon affiliate links, meaning I may earn a small commission if you purchase through my links, at no extra cost to you.
Frequently Asked Questions
What are some easy DIY Halloween decorations I can make at home?
There are plenty of easy DIY Halloween decorations you can whip up in no time! Some fun options include creepy mason jar lanterns for a spooky glow, ghostly cheesecloth figures that float effortlessly, or pumpkin planters that blend festive charm with fall colors. These projects are budget-friendly and perfect for a quick afternoon crafting session!
How can I make my Halloween decorations kid-friendly?
Creating kid-friendly Halloween decorations is all about choosing safe materials and simple projects! Consider making DIY witch’s brooms using lightweight supplies or bloody handprint window clings with washable paints. Engaging kids in projects like scarecrows or mini pumpkin vases can also be a fun way for the whole family to get involved while keeping things safe and enjoyable.
What materials do I need for DIY Halloween decorations?
The materials you’ll need for your DIY Halloween decorations can vary based on the project, but common supplies include mason jars, cheesecloth, pumpkins, and black paper. Many decorations can be made using items you already have at home along with inexpensive craft supplies. Don’t forget to grab some glow-in-the-dark paint or LED lights to add that extra spooky touch!
How can I make my Halloween decorations last for future years?
To ensure your Halloween decorations last for years to come, use sturdy materials and store them properly after each season. For example, DIY tombstones made from foam boards can be reused with care. Opt for decorations that are easy to clean and maintain, like Halloween-themed throw pillows or fabric garlands. A little care can keep your spooky decor looking fresh for many Halloweens ahead!
What is the most surprising DIY Halloween decoration idea mentioned in the article?
One of the most surprising DIY Halloween decoration ideas is the shocking bloody footprints that guide guests to your front door! This bold decoration is not only easy to create but adds an element of surprise that will stick with your guests. You can control the look and mess, making it a fun and impactful way to set the Halloween mood!
Related Topics
Halloween decorations
DIY decor
spooky crafts
budget friendly
quick projects
family friendly
outdoor Halloween
easy DIY
fall decor
creepy ambiance
Halloween party
seasonal crafts