


Here is why I wrote this post. This season has me craving simple, joyful ways to brighten the yard. Projects you can finish on a weekend and still have time to enjoy the space. I pulled together 21 DIY Hippie Garden Projects that can turn your outdoor space into a boho paradise. They use easy materials, soft light, and lots of texture.
Who it’s for It speaks to garden lovers who want texture, light, and a little whimsy. If you love laid back vibes, fairy lights, and crafts that don’t cost a lot, this is for you. You want a space that feels calm, personal, and easy to care for.
What you’ll get is a set of practical ideas that are cheap, doable, and cozy. You’ll learn how to pick supplies and plan a build that lasts through sun and rain. I’ll share a few examples like bottle lanterns, macrame plant hangers, painted rocks, and a small herb corner. Each idea comes with simple steps you can copy today.
Start with a small corner and lay down a soft rug. Add a string of warm fairy lights. Put a few potted plants, a low bench, and a seat made from pallets. Think textures: rope, wood, cotton fabric. These ideas work with common garden spaces and weathered patios. I explain what to use and how to keep things safe and sturdy.
Reality check Not every idea fits every yard. Some ideas suit renters, some work better in bigger spaces, and some need a weekend of effort. This is not a magic fix, but a gentle path to a cozier yard. Use outdoor paint and sealant for rain, or choose items that can stay outside all season. Most projects rely on items you already own or can grab cheap.
Next steps Plan: Pick one starter idea, gather basic supplies, and set a date to start. Work with a friend or family to add a social touch. Document progress and adjust light, color, and plant choices as you go. The result is a warm, boho space that feels like your own.
1. Macrame Plant Hangers
If you want a cozy, boho touch in your yard, macrame plant hangers can help. They bring art and function together. Made from strong cotton rope, they hold pots and add texture that moves with the breeze. Hang them on trees, porch beams, or from hooks to free up floor space.
What you’ll need
– Cotton rope or braided cord (60–100 ft total, depending on pot size)
– Scissors
– A few pots
– A ring or wooden dowel to start
– Optional beads or paint for a personal touch
Easy steps
1) Cut even lengths of rope. Shorter for small pots, longer for tall hangers.
2) Attach to your ring or dowel with a simple knot. This becomes the hanger top.
3) Create patterns with square knots. Keep your pull firm so the cords stay neat.
4) Tie a bottom knot to hold the pot steady. Gather the cords as you finish.
5) Trim ends and adjust the length. Hang at different heights for depth in your space.
Tips you can use
– Pick natural tones or a bright color that fits your garden mood.
– Tight knots stay strong; check weight before hanging a heavy pot.
– Let some hangers be higher and some lower to add dimension.
Why this matters
Macrame hangers honor a simple craft and let your plants shine. They’re quick to learn and easy to customize. Plus, they give you more space to enjoy your outdoor room.
1. Macrame Plant Hangers
Editor’s Choice

NOANTA Natural Macrame Cord 3mm x 109Yards, Beige Macrame Rope, Cotton C…

Ewparts Macrame Plant Hanger Kit with Instruction Book Tutorials Metal R…

Gepege 6 Inch Beaded Ceramic Planter Set of 2 with Drainage Hole and Sau…
2. Painted Garden Stones
If you want a splash of color in your yard without a big project, painted garden stones are a perfect fit. This easy DIY adds your own voice to the outdoors. It’s fun to make and fun to use.
– 1. Pick and prep stones. Choose smooth, flat stones. Clean them well and let them dry before you begin.
– 2. Gather supplies. Get outdoor-grade acrylic paints, brushes, a small tray, and a clear sealant for outdoors.
– 3. Plan your designs. Think quotes, simple flowers, animals, or abstract shapes. Sketch ideas on paper first if you like.
– 4. Start painting. Use a base color, then add big shapes first. Fill in details last. Let each layer dry before the next.
– 5. Seal the stones. Apply a clear outdoor sealer to protect the colors from sun and rain. Let it cure fully.
– 6. Place them with care. Line a path, mark a bed edge, or make a tiny garden circle with your stones.
– 7. Maintain over time. Clean gently and touch up chips. Re-seal every year for best life outdoors.
This craft looks great with earthy tones and bright accents. It gives your path a cheerful vibe while staying easy to learn and do. It’s a small project with big joy for a hippie garden.
2. Painted Garden Stones
Editor’s Choice

Shuttle Art 18 Colors Acrylic Paint Bottle Set (250ml/8.45oz), Rich Pigm…

GE All Purpose Silicone Caulk – 100% Waterproof Silicone Sealant, Strong…

Soucolor Acrylic Paint Brushes Set, 20Pcs Round Pointed Tip Artist Paint…
3. Upcycled Pallet Planters
You want cheap, stylish planters that fit your outdoor vibe. Upcycled pallet planters fit the bill. They are sturdy, rustic, and easy to move. Use them for flowers, herbs, or trailing greens. You can stand a pallet upright for a vertical wall of life, or lay it flat for a low, cottage feel. Here is why this works: you reuse wood, cut waste, and get garden art all in one.
What you need
– HT pallets or reclaimed wood
– Landscaping fabric to hold soil in place
– Potting mix and garden soil
– Plants that thrill you, especially herbs or trailing flowers
– Paint or stain in your garden colors
– Screws, a drill, and basic tools
– Optional wheels or caster hardware
– Hooks for hanging baskets (if you want a wall of greenery)
Let’s break it down
– Step 1 Clean the pallet. Scrub, sand smooth, and remove rough bits.
– Step 2 Decide orientation. Stand it up for vertical space or lay it for a bench look.
– Step 3 Line the planter. Put fabric inside to keep soil from washing through.
– Step 4 Add drainage. Make a few small holes or a thin layer of gravel at the bottom.
– Step 5 Color it. Paint or stain to match your yard and seal it.
– Step 6 Build the frame. Attach wheels for moveable setups or hooks for hanging baskets.
– Step 7 Fill and plant. Add soil, then your chosen plants. Pack lightly and water gently.
Care tips: water in the morning, feed every few weeks, and trim dead growth. Pallet planters save money, cut waste, and bring a cozy, boho touch to any garden.
3. Upcycled Pallet Planters
Editor’s Choice

Remerry 12 Pcs 3.5 Inch DIY Ceramic Succulent Pots for Painting Figurine…

Rintea 4FTX300FT Weed Barrier Fabric, 3.2oz Landscape Fabric, Durable We…

Miracle-Gro Potting Mix, For Container Plants, Flowers, Vegetables, Shru…
4. Fairy Garden
You want a small, magical spot in your yard that kids love and guests notice. A fairy garden fits that idea and is easy to care for.
– Step 1: Choose a calm spot in your yard that gets a bit of sun or shade.
– Step 2: Use a shallow container or large planter to keep things manageable.
– Step 3: Build layers with a tall backdrop plant and small front plants to add depth.
– Step 4: Add tiny furniture and fairy figurines to tell a story. Create a path with mini stones to guide the eye and your steps.
– Step 5: Form a simple walk path with flat stones or gravel for easy watering and care.
– Step 6: Choose compact plants that stay small, such as dwarf thyme, moss, sedum, and tiny ferns.
– Step 7: Make sure the soil drains well and water slowly when the soil dries a bit.
– Step 8: Keep it neat by pruning, swapping seasonal accents, and tidying fallen leaves.
A fairy garden invites whimsy and becomes a friendly focal point in your hippie space. It gives you a fun project to share with kids or friends. Next steps: start small, prune regularly, and add one new piece each season to keep the scene fresh.
Create a whimsical escape right in your yard! A fairy garden can spark joy for kids and adults alike, inviting magic into your DIY hippie garden. 🌿✨
4. Fairy Garden
Editor’s Choice

Dracarys Selected 100 Pcs Fairy Garden Accessories, Mini Resin Animals, …

MOMOONNON 28 Pcs Miniature Fairy Garden Tree Plant Ornament, Mixed Model…

2 Pounds Pebbles for Plants, 3/8 Inch Succulent Rocks, Decorative Polish…
5. Succulent Wall Art
Looking for green on a wall? Try succulent wall art. This DIY uses vertical space to add life. Here is why it works: succulents stay small, need little water, and hold moisture in leaves.
What you need
– a wooden frame or pallet
– breathable fabric pockets with small drainage holes
– a tray or waterproof backing
– well-draining cactus mix
– a handful of mixed succulents that fit pockets
– screws or zip ties to mount
Let’s break it down. Step 1: mount the frame securely on a wall or fence. Step 2: attach the pockets in a grid or simple pattern. Step 3: fill pockets with cactus mix. Step 4: press each succulent into its pocket and firm the soil.
Design ideas
– create a checkerboard of green and silver rosettes
– spell a word or form a simple shape with different colors
– mix textures like smooth, fuzzy, and bumpy leaves
Care and maintenance
Place the piece in bright sun. Water sparingly only when the soil dries. Check that pockets drain well and avoid standing water. Rotate plants every few months to keep the display even.
Next steps
Measure your wall, pick a frame, gather supplies, and start this succulent wall art project.
Transform your walls into a living masterpiece! With DIY succulent wall art, even small spaces can bloom into a vibrant boho paradise.
5. Succulent Wall Art
Editor’s Choice

VIVOSUN Wooden Raised Garden Bed, 48 x 24 x 30 Inches, Outdoor Wood Plan…

25 Pockets Felt Plant Pockets, 2 Pack Reusable Fabric Felt Vertical Gard…

Back to the Roots 100% Organic Succulent & Cacti Mix (6 Quart) | Made in…
6. Garden Wind Chimes
Craving a soft, musical touch in your garden? DIY wind chimes give you sound, color, and a bit of upcycled charm.
What you’ll use:
– Old keys, shells, glass bottles, bottle caps, beads, small metal pieces.
– Sturdy string, fishing line, scissors, pliers, and some paint or sealant.
Choose a base:
– A strong branch, a metal hoop, or a driftwood ring. Attach it to a hook or sturdy branch.
Step-by-step:
– Gather your items and small strings.
– Tie pieces onto several strings at varying lengths.
– Leave some gaps so wind can move them.
– Make sure knots are tight and the base is secure.
Finish and sound:
– Paint items to match your garden or leave them rustic.
– Test the chimes in a breeze. Mix light and heavy pieces for different tones.
Placement and care:
– Hang where wind flows but shield from heavy rain.
– Check knots monthly and replace worn pieces as needed.
Why you’ll love it:
– The chimes create gentle music and movement.
– They recycle junk into art.
– It’s an easy, wallet-friendly project.
Next steps:
– Gather scraps, pick a base, and start threading.
– Turn on your porch light at dusk and hear a soft hum.
– With time you will tune the mix by swapping pieces.
Your own boho soundscape awaits.
Transform your outdoor oasis with DIY hippie garden wind chimes! A symphony of sound and color can turn any space into a boho paradise – all from upcycled treasures!
6. Garden Wind Chimes
Editor’s Choice

DIY Wind Chime Kits for Kids – Makes 12 – Assorted Spring Theme Shapes -…

60 Pieces Wind Chime Tubes Parts Supplies Windchime String Metal Tubes f…

15 Colors Large Acrylic Paint Set (16.9 oz,500 ml), Bulk Acrylic Paint N…
7. Bohemian Seating Area
If you want a cozy garden escape, a bohemian seating area can flip your space. It gives you a calm place to unwind, chat, and enjoy the outdoors. Here is why it works: soft cushions, warm fabrics, and simple touches create a welcoming mood.
– 1. Pick a shaded spot under a tree. Comfort comes first.
– 2. Choose seating that fits your space. Pallets are sturdy; bean bags are flexible; retro chairs add extra charm.
– 3. Layer with textiles. Cushions and throws help. Keep colors linked for harmony.
– 4. Define the area with a rug. It anchors furniture and adds warmth.
– 5. Light it softly with string lights or lanterns. Battery or solar works well.
Finish with greens: place potted plants around the seating and on a low side table. A couple of wall hangings or a macrame piece can finish the look.
Next steps: choose fabrics that stand up to weather, store cushions when rain comes, and enjoy your new boho garden corner. If you have kids or guests, keep cushions removable and easy to clean. Your guests will love it.
7. Bohemian Seating Area
Editor’s Choice

Outdoor Chair Cushions Set of 4, Waterproof Patio Chair Cushions, 19″ x …
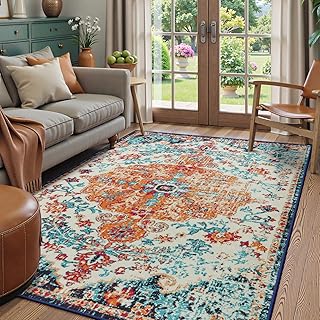
Lahome Bohemian Floral Medallion Area Rug – 5×7 Oriental Distressed Larg…

luckystyle 100FT Solar String Lights Outdoor Waterproof 2200K with Remot…
8. Herb Spiral Garden
If you want fresh herbs and your yard is small, this idea works. A herb spiral garden uses a curved wall of stones to make a compact, multi-level bed.
Here is why it helps. The spiral creates microclimates. The outer rim stays dry and warm, great for rosemary and thyme. The inner pockets stay cooler and moister, perfect for basil and mint. The shape also boosts drainage and stops roots from sitting in soggy soil.
Place your spiral in a sunny spot. Add a splash of color with small flowers or decorative rocks around the base. Mint can take over, so give it its own little pocket or keep it in a separate pot.
How to build it in simple steps:
– Pick a sunny, open patch.
– Lay out a gentle spiral with string or chalk.
– Stack stones or bricks to form the wall.
– Fill inside with good soil, compost, and sand for drainage.
– Plant from the outside in, grouping herbs by how much water they like.
– Add mulch to lock in moisture and beat weeds.
– Water when the top inch dries.
Care and use:
– Harvest often to spur new growth.
– Trim mint back to stop it from spreading.
– Refresh soil every season.
The result is a pretty, practical feature that gives you fresh herbs at arm’s reach.
8. Herb Spiral Garden
Editor’s Choice

Espoma Organic Raised Bed Mix – All Natural and Organic Potting Soil Mix…

Vesici 6 Set Mason Jar Plant Germination Kits Hydroponic Herb Garden Pla…
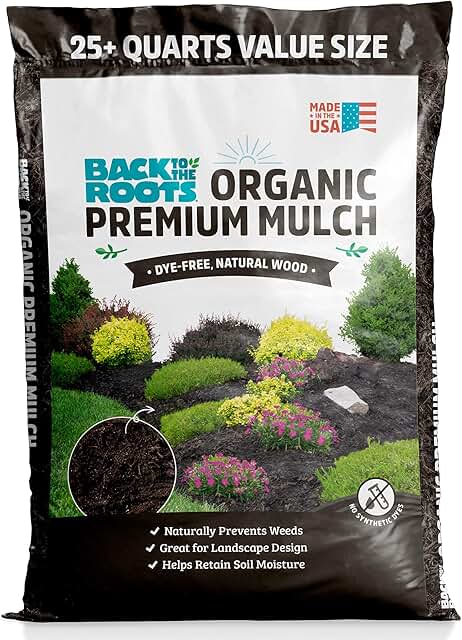
Back to the Roots 25.7qt (1 Cubic ft) Organic Premium Mulch
9. Mosaic Garden Pathway
You want a path that guides guests through your yard and still feels warm and homey. A mosaic garden pathway can do that. It blends art with everyday use.
Here is why it works: broken tiles, stones, or glass pieces add color and texture. Light hits them differently as the day goes on, making your path feel alive.
Next steps:
– 1) Plan your design. Keep it simple if you are new to mosaics. Test ideas by laying pieces on the ground to see how they look.
– 2) Gather supplies. You need mosaic pieces, mortar or concrete mix, grout, a sealant if you want extra protection, a trowel, and a bucket. Don’t forget gloves and safety glasses.
– 3) Prepare the site. Clear the area and flatten the surface. A small base of sand or crushed rock helps with drainage.
– 4) Lay out the pattern. Move pieces around until you like the spacing and color balance.
– 5) Set the pieces. Press each piece into mortar so it stays put.
– 6) Let it cure. Protect the area from rain while it dries.
– 7) Fill the joints. Mix grout and push it into gaps. Wipe off the surface and let it dry.
– 8) Finish and care. A light seal can slow wear. Sweep often and reseal every few years if you like.
Design ideas to try: curved paths, checkerboard blocks, or a sunburst center. Earth tones blend with flowers; blues and greens feel fresh.
Common questions: with a proper base, a mosaic path lasts many seasons. You can reuse old pieces to cut costs. Start small with a 4×8 ft strip to test your style.
9. Mosaic Garden Pathway
Editor’s Choice

DIY Glass Mosaic Tiles for Crafts, Mixed Color Mosaic Kits with Wooden C…

CUSTOM BLDG PRODUCTS SimpleSet Pre-Mixed Thin-Set Mortar 1 QT

WORKPRO 3 pack Safety Glasses Z87.1 Anti Fog Eye Protection Safety Goggl…
You might also like

10. Hanging Garden Jars
Are you after a playful, space saving way to bring life to your outdoor space? Try hanging garden jars. They turn simple glass jars into tiny plant homes and add color without crowding the ground.
Here is what you need and how to do it:
– Pick jars you can spare. Mason jars or small clear jars work best.
– Add drainage. Drill a small hole in the bottom or use a lid with a screen and a little gravel.
– Fill with soil. Use a mix that fits your plant. Succulents need grit; herbs like a light mix.
– Plant one per jar. Trailing plants such as ivy or string of pearls shine. Small herbs work too.
– Hang them. Use sturdy rope or wire. Attach to a beam, a tree branch, or a fence. Mix jars of different sizes for a lively mix.
– Care tips. Water when the top inch of soil dries. Put jars where the sun matches each plant’s needs.
Why it helps: you gain vertical green space, quick color, and a project you can move as seasons turn. Next steps: gather jars, choose a sturdy spot, and start your jar garden today. This setup is easy to swap with new plants as the seasons change.
10. Hanging Garden Jars
Editor’s Choice
![Wide Mouth Mason Jars 16 oz [5 Pack] With Mason Jar Lids and Bands, Maso...](https://m.media-amazon.com/images/I/81jo+KgW1yL._AC_UL320_.jpg)
Wide Mouth Mason Jars 16 oz [5 Pack] With Mason Jar Lids and Bands, Maso…
Back to the Roots 100% Organic Succulent & Cacti Mix (6 Quart) | Made in…

Ceiling Hooks for Hanging Plant, Hanger for Indoor and Outdoor Plant Pot…
11. Garden Trellis
Garden Trellis
Here is why you want one. It adds height, makes a cozy frame for vines, and gives your outdoor space a boho touch.
– Pick your materials. Reclaimed wood or bamboo fit a laid-back vibe. They are easy to work with and kind to the planet.
– Choose a look. A classic lattice adds charm. A sleek grid feels modern. Match the design to your space and style.
– Build it right. Set a sturdy base with stakes that go deep. Add braces so it won’t tip in wind. Leave room for plants to climb.
– Plan the plants. Beans give you quick green cover. Clematis or morning glories bring color. Let vines weave through the gaps.
– Finish with style. Paint or stain outdoor-safe colors to blend with your yard. A protective finish helps it last through rain and sun.
– Care as it grows. Tie shoots with soft twine. Prune dead bits so it stays tidy. Check screws and anchors every season.
– The benefit. It creates a focal point and guides the eye around your space. It can also shade a small nook as vines fill in.
– Next steps. Gather supplies this weekend. Sketch a simple layout and mark where you will plant.
11. Garden Trellis
Editor’s Choice

Dura-Trel Cambridge Vinyl Trellis, Outdoor Plant Support Frame, 28″ x 76…

5 Pack 4 Feet U-Shape Bamboo Trellis, Natural Bamboo Trellis for Climbin…

1 Gallon White Exterior Barn & Fence Latex Paint 18-3121-70 GL
12. Colorful Garden Flags
Want a quick color boost for your yard? Colorful garden flags are a simple DIY project that changes your outdoor look. They flutter in the breeze and show your boho mood from every angle.
Here is why they work: flags catch light, move gently, and guide the eye along walkways.
– Choose outdoor fabric and colors that fit your boho vibe. Choose lightweight canvas or polyester in bright reds, turquoise, gold, or pink.
– Cut flags to your favorite size. Rectangles are easy and work well.
– Paint or dye the fabric with outdoor paint. Create bold patterns or add quotes you love.
– Attach to wooden dowels with a simple stitch or glue.
– Protect it from weather. Set the paint with heat or seal the fabric.
– Build a seasonal collection. Switch flags with spring or autumn colors.
– Display tips. Clip flags to a fence, trellis, or garden arch for quick impact.
– The result is a welcoming, personal space.
Next steps: start with one or two flags, test colors, and plan a small set. Store extras in a tote for easy seasonal swaps.
Want more impact? Mix flag sizes and add tassels. Include a quote you love to make it personal. Do this today.
12. Colorful Garden Flags
Editor’s Choice

Waterproof Fabric by The Yard 600d Cordura Canvas Fabric 58 inch Wide fo…

Bulk buy: Tulip ColorShot Outdoor Upholstery Spray Paint 8 oz, (Pack of …

50Pcs Wooden Dowel Rods 1/4 x 12 Inch Wood Sticks for Crafts, Precut Woo…
13. Recycled Container Garden
Want a low-cost way to brighten your outdoor space? A recycled container garden lets you turn old items into lively planters. It saves waste and money.
Here is why it works. It fits small spaces. It lets you use paint and color to match your boho vibe. It invites you to move plants around until it feels right.
Next steps:
1) Gather containers. Think old cans, teacups, wooden crates, jars with lids. You can mix metal, ceramic, and wood for texture.
2) Prep each holder. Clean it well, remove labels, and smooth rough edges.
3) Add drainage. Drill or punch holes. Line with a shard of broken pottery if you like.
4) Decorate. Paint bright colors, wrap with twine, or stencil patterns.
5) Fill and plant. Use a light potting mix plus a splash of compost. Choose herbs or compact flowers that thrive in pots.
6) Arrange. Stack crates for height, set cans on a stand, group colors for a bohemian feel.
7) Care. Water regularly, check moisture, and move plants to sun or shade as needed.
Your outdoor space gains charm with every piece you repurpose. A recycled container garden is bold and green. You can mix in a few glass jars for sparkle.
13. Recycled Container Garden
Editor’s Choice
Miracle-Gro Potting Mix, For Container Plants, Flowers, Vegetables, Shru…

DEWALT Drill Bit Set, 3-Flats Shank,14-Piece, 135 Degree Split Point, fo…

Acrylic Paint Set, 24 Colors (2 oz/Bottle) with 12 Art Brushes, Art Supp…
14. Garden Art with Wine Bottles
Want a bright, cozy touch in your yard? Wine bottles can do that. This little project is cheap, green, and fits a boho garden vibe. You get art you can use every day.
– Prep the bottles. Gather a bunch of bottles, rinse them well, and remove labels. If glue sticks, soak in warm soapy water for a while. Let them dry in the sun so they feel ready to shine.
– Pick the look you like. Clear bottles give a calm, light feel. Painted bottles add color and personality. If you paint, use a glass-safe spray and let each coat dry completely.
– Decide the role. Garden borders work great when you bury bottles neck-down along a path. Plant holders can sit along a wall or bed edge; fill the bottle with soil and tuck a tiny plant into the opening.
– Set them up. Space the bottles 6 to 12 inches apart for a smooth line. Create curves to soften straight edges and guide the eye through your space.
– Mix colors and heights. Use tall and short bottles together. Group bright hues for a playful feel or keep it simple with clear glass for a clean, airy look.
– Keep it safe and easy to care for. Place borders where feet won’t hit them. Check for sharp edges after heavy weather and clean bottles at the start of each season.
Wine bottles turn ordinary space into art. They recycle glass and let your personality shine. Ready to start your own bottle garden?
14. Garden Art with Wine Bottles
Editor’s Choice

Rust-Oleum 342600 Frosted Glass Spray Paint, 11 oz, Frosted Glass(Packag…

Costa Farms Live Plants (3 Pack), Easy to Grow Real Indoor Houseplants, …

EasyFlex 10 in. Landscape Anchoring Stake Pack – 10 Ct., Black
15. Nature-Inspired Wall Decor
You want walls that echo your hippie garden. Nature-inspired wall decor lets you bring the outdoors inside. It uses natural materials to create art that feels alive.
– Materials to gather:
– Twigs and small branches
– Leaves and pressed flowers
– Stones, shells, pinecones
– A canvas, wooden board, or a simple frame
– Glue or hot glue
Here is how to make it work. Start with a clear theme. You might pick a season, a color family, or a texture you love. Lay out your pieces on the base first. Move things around until the arrangement feels right.
Then attach pieces one by one. Use a dab of glue on each item and press firmly for a few seconds. If you want a neat look, use a simple frame or mount the art on a wooden board. A light spray of sealant can help protect the pieces, but skip heavy coatings.
Now, display with care. Hang at eye level and away from direct sun to keep colors from fading. Keep the feel cohesive by repeating a similar shape or color cue in each piece.
Next steps: switch in new finds with the seasons. Dust gently and check the glue every so often.
15. Nature-Inspired Wall Decor
Editor’s Choice

Gorilla Mini Hot Glue Gun Kit (Pack of 1 Mini Hot Glue Gun and 30 Sticks…

FSWCCK 10 Pack 6 x 6 inch Wood Panel Boards, Unfinished Wood Canvas Pane…

Mod Podge Spray Acrylic Sealer that is Specifically Formulated to Seal C…
16. DIY Rain Chain
Want a rain feature that feels boho and is easy to build? A rain chain can do it. It swaps a plain downspout for a row of cups, links, or seashells. Water slides down the chain and makes soft taps and a quiet rush. You get visual interest plus a soothing sound without a big project.
Materials You can use cups, metal links, seashells, or a mix. Pick colors that fit your garden—warm tones or natural metal. You’ll also need a gutter hook or short chain, some wire or cord, and a sealant to keep water from leaking around the top.
Next steps. Here is how to set it up:
– 1) Decide how long you want the chain to hang and where it starts under the roof edge.
– 2) If you keep the old downspout, loop the chain through a bracket and let it hang; if you remove it, mount the chain directly to the gutter.
– 3) Thread cups or shells onto the chain and connect pieces with links. Space them so water moves smoothly.
– 4) Attach the top securely to the roof edge with a sturdy hook or bracket. A short bit of chain helps support the top.
– 5) Test with a watering can. Watch water run down the cups and listen for the gentle splash. Tweak spacing if needed.
Tips. Use bright colors for a playful look or keep metal pieces for a natural vibe. Clean debris now and then so water drains well.
Next, maintenance. Check the chain after storms and wipe it dry when you can. A little care keeps your rain chain looking good and working well.
16. DIY Rain Chain
Editor’s Choice

KingChain 698351 0.22inch x 15 ft. Zinc-Plated Proof Tested Coil Chain w…

Rain Chain Clip for Gutter Adapter, Outside Hardware Rain Catcher System…

GE Advanced Silicone Caulk for Window & Door, Clear, 2.8 fl oz Tube, 1 P…
You Might Also Like


17. Upcycled Tire Planters
Here is why this works. Upcycled tire planters bring color, height, and life to any outdoor space. They’re budget friendly and easy to keep up. You can mix fun colors with natural tones to match your vibe. Ready to try it? Here are practical steps you can follow now.
Next steps
– Prep the tires. Wash each tire well and scrub away dirt. Let them dry completely. A clean base helps paint stick and lasts longer.
– Decide the layout. Stack tires for a tiered garden bed or lay them flat as low, wide planters. Think about sun and how you walk through the area.
– Add color or a natural look. Paint the tires in bright shades or coat them with a clear seal for a rustic feel. Use weatherproof paint so colors stay bright.
– Make drainage solid. Drill small holes in the bottom of each tire. Add a thin layer of gravel or broken pot shards to keep soil from clogging holes.
– Fill and plant. Use quality potting soil with a touch of compost. Plant flowers, herbs, or small vegetables. Mix sizes and colors for a lively display.
Your garden gains a playful focal point that’s easy to move and swap out as the seasons change.
17. Upcycled Tire Planters
Editor’s Choice

Rust-Oleum 334020 Painter’s Touch 2X Ultra Cover Spray Paint, 12 oz, Fla…
Miracle-Gro Potting Mix, For Container Plants, Flowers, Vegetables, Shru…

INTOO Mini Drill Bit Set 60 Pcs+12 Pcs Free High Speed Steel HSS Titaniu…
18. Boho Dreamcatchers for the Garden
Looking to add calm magic to your garden? Boho dreamcatchers bring color, texture, and a sense of protection. They look inviting and add a soft, whimsical glow.
What you need
– Wooden hoops or metal rings
– Sturdy string or cord
– Feathers, beads, dried flowers
– Optional shells or small wooden beads
How to make
Wrap the hoop with cord. Tie a simple web inside the ring. Loop beads and string feathers along the yarn.
Where to hang
Choose a spot where wind can move them gently. A sunlit tree branch, a gate, or a fence rail works well. Put them at eye level for easy notice.
Color ideas
Match colors to your garden. Use white and natural tones for a calm look. Mix a few bold accents to wake up greens and browns.
Size and placement
Use a mix of small and large dreamcatchers. Group three on a fence or line them along a trellis.
Durability and care
Pick weather-safe cord. Seal wooden hoops or use coated wood. Bring them inside before a heavy rain or long frost.
Fun variations
Add pinecones, dried citrus, or sprigs of lavender. Try tiny air plants for a living touch. Play with textures like jute and silk.
Dreamcatchers in your garden reflect your style and offer a serene touch you will enjoy daily.
18. Boho Dreamcatchers for the Garden
Editor’s Choice

AOBOPLE 30 Pack Bamboo Floral Hoops,10 Size Wooden Wreath Rings Multi-Si…

PH PandaHall 21.9 Yards 3mm White Twisted Cord, 3 Layers Braided Cord wi…

Beadthoven Stainless Steel Filigree Charm DIY Earrings Pendants Feather …
19. Rustic Birdhouses
Rustic Birdhouses that fit your garden
You want a garden that feels alive. Rustic birdhouses give you both charm and use. They shelter birds and add woodsy texture to your space. Start with reclaimed wood or refresh a store-bought box to match your look—classic, whimsical, or simple. Hang them from a branch or mount a sturdy post where birds can spot shelter.
– Materials and finish: Choose reclaimed wood when you can. Seal only the outside with a weatherproof, non-toxic finish. If you paint, pick outdoor-safe colors and leave the inside bare wood.
– Designs to fit your garden: Pick a plain box, a tiny cottage, or a sleek, modern shape. Add a small roof overhang or trim that mirrors your style.
– Placement and safety: Install 4 to 6 feet high on a stable post or strong branch. Position away from busy paths and face the opening away from prevailing winds.
– Ventilation, drainage, and entry: Drill two small vents near the top for air. Add tiny drainage holes in the floor. Use a door hole about 1 to 1.5 inches for small birds.
– Maintenance and care: Clean the box once a year after nesting. Remove old nests and check for rot. Replace damaged wood.
– Predator protection and color: Add a predator guard on the mounting pole. Use earth tones to blend in, with a subtle roof detail for charm.
With the right build and care, rustic birdhouses invite birds and add character to your space.
19. Rustic Birdhouses
Editor’s Choice

Premium Wooden Bird House Kit – Build it Yourself Birdhouse – Birdhouse …

Eco Advance Exterior Wood Siloxane Odorless Spray-On Application Waterpr…

20. Outdoor Candle Holders
Want a calm glow in your yard after dark? Outdoor candle holders give you a soft boho vibe and calm mood. Here is why and how to make them work for you.
– Materials – choose jars, wood slices, or coconut shells as the holder base. Add LED candles, paints or stain, twine, and natural scraps like leaves or dried flowers. A little hot glue helps keep pieces together, and a small bag of sand or pebbles makes the base heavy so it stays put in a breeze.
– Design ideas – decorate with earthy colors. Paint stripes, dots, or natural tones. Wrap twine around edges or attach a few dried blossoms for a bohemian touch. Keep the look simple so it fits your garden.
– Placement tips – group holders in small clusters on a patio step, line a walkway, or set them on a table amid plants. If you add hooks, you can hang a few from a low beam to catch the eye.
– Safety – use LED candles for fire-free light. Place holders away from dry leaves, and keep flames away from wood or fabric. Check batteries every season.
– Maintenance – wipe the holders clean after rain and store loose pieces in a dry spot. Swap in fresh LEDs as needed.
Next steps: grab some simple pieces this weekend and test a small cluster. With a little care, your garden will glow like a cozy retreat.
20. Outdoor Candle Holders
Editor’s Choice

Flameless Candles Led Candles Pack of 9 (H 4″ 5″ 6″ 7″ 8″ 9″ x D 2.2″) R…

PerkHomy Natural Jute Twine 600 Feet Long Twine String for Crafts Gift W…
34 OZ Vintage Glass Jar with Lid, Airtight Food Storage Canisters with B…
21. Garden Mirror
– Garden mirror: your quick fix for light and space You want a garden that feels bigger and brighter. A garden mirror can help. It reflects light and creates the look of more room. Choose a weatherproof outdoor mirror with a solid frame.
– Where to put it Pick a wall or sturdy post. Put the mirror where it will catch sun or bounce light into a dark corner. Avoid direct glare on seating areas.
– How to style it Frame the edge with vines or flowers for a seamless look. Use rustproof hardware so it lasts through rain and wind. Secure mounting is a must.
– Positioning tips Start low so you see plants in the reflection. Adjust until the view feels right. The best view changes with the seasons, so check it every few weeks.
– Care and safety Clean the glass with a soft cloth and mild soap. Check screws and brackets a few times a year. Keep nearby plants trimmed so the mirror stays clear.
– The payoff You get depth, charm, and a touch of magic. The space feels larger and more inviting. In a hippie garden, a mirror adds a playful, surprising element. Try different frames to change the mood. Then enjoy the glow at dusk.
A garden mirror can work wonders! Reflect light, create the illusion of space, and turn your DIY hippie garden into a vibrant boho paradise. Embrace the magic of mirrors and let your garden shine!
21. Garden Mirror
Editor’s Choice

26” Outdoor Acrylic Convex Mirror/Plastic Back – Round Safety Mirror for…

180Pcs 304 Stainless Steel Flat Washers Kit – 8 Sizes (M2-M10) Metric Sp…

Garden Trellis for Climbing Plants Outdoor, 65 Inch Mushroom Top Trellis…
Conclusion
Your outdoor space can become a hippie paradise filled with creativity and tranquility through these DIY projects. Each idea presented here is an opportunity to express your unique style while connecting with nature.
As you embark on these projects, remember to have fun and let your imagination run wild!
Join the movement of transforming gardens into beautiful retreats, and let your bohemian spirit shine.
Note: We aim to provide accurate product links, but some may occasionally expire or become unavailable. If this happens, please search directly on Amazon for the product or a suitable alternative.
This post contains Amazon affiliate links, meaning I may earn a small commission if you purchase through my links, at no extra cost to you.
Frequently Asked Questions
What are some easy DIY hippie garden projects for beginners?
If you’re just starting out, you might want to try projects like painted garden stones and macrame plant hangers. These projects are not only simple but also allow you to express your creativity while adding a boho touch to your outdoor space. You can complete them in a weekend and enjoy the satisfaction of your handiwork!
How can I create a cozy bohemian seating area in my garden?
Creating a cozy bohemian seating area is all about comfort and style! Use soft cushions and warm fabrics to make your space inviting. You can also add elements like low tables or a fire pit to enhance the atmosphere, making it a perfect spot for relaxation and gatherings with friends.
What materials do I need for a succulent wall art project?
For a stunning succulent wall art project, you’ll need a few essential materials: some wooden boards to serve as a base, a variety of succulents, potting soil, and gardening tools. It’s a fun way to utilize vertical space while bringing a touch of greenery to your outdoor area. Just remember to choose succulents that require minimal water!
Can I make a DIY rain chain, and what materials do I need?
Absolutely! Making a DIY rain chain is both fun and rewarding. You can use materials like cups, links, or even seashells to create a beautiful and functional piece. Simply replace your standard downspout with your creative rain chain to add charm and interest while directing rainwater flow!
How do I maintain a recycled container garden?
Maintaining a recycled container garden is quite simple! Ensure that your containers have proper drainage and are filled with quality potting soil. Regular watering is key, but be careful not to overwater. Keep an eye on your plants and deadhead as necessary to encourage growth. It’s a sustainable way to brighten your outdoor space!
Related Topics
DIY hippie garden
boho paradise
upcycled projects
nature decor
beginner friendly
outdoor creativity
easy DIY
rustic garden
garden art
colorful planters
seasonal gardening
whimsical designs